9216
This term originates from Latin and means “closure.”
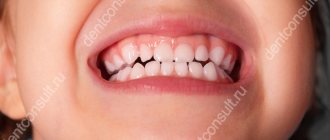
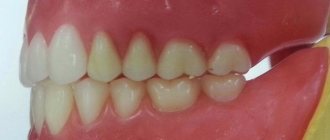
Central occlusion is a state of evenly distributed tension of the jaw muscles, while ensuring simultaneous contact of all surfaces of the elements of the dentition.
The need to determine central occlusion is to correctly manufacture a partial or removable denture.
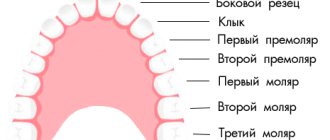
Main features
Experts have determined the following indicators of central occlusion:
- Muscular. Synchronous, normal contraction of the muscles responsible for the functioning of the lower jaw bone.
- Articular. The surfaces of the articular heads of the lower jaw are located directly at the bases of the slopes of the articular tubercles, in the depths of the articular fossa.
- Dental:
- full surface contact;
- opposite rows are brought together so that each unit is in contact with the same and the next element;
- the direction of the upper frontal incisors and the similar direction of the lower ones lie in a single sagittal plane;
- the overlap of the elements of the upper row of fragments of the lower one in the front part is 30% of the length;
- the anterior units contact in such a way that the edges of the lower fragments abut the palatine tubercles of the upper ones;
- the upper molar comes into contact with the lower one so that two-thirds of its area is combined with the first, and the rest with the second;
If we consider the transverse direction of the rows, then their buccal tubercles overlap, while the tubercles on the palate are oriented longitudinally, in the fissure between the buccal and lingual of the lower row.
Signs of correct row contact
Are common:
- the rows converge in a single vertical plane;
- incisors and molars of both rows have a pair of antagonists;
- there is contact between units of the same name;
- the lower incisors do not have antagonists in the central part;
- the upper eighths have no antagonists.
Applies to anterior units only:
- if we conditionally divide the patient’s face into two symmetrical parts, then the line of symmetry should pass between the front elements of both rows;
- the upper row of fragments overlaps the lower one in the anterior zone to a height of 30% of the total crown size;
- the cutting edges of the lower units are in contact with the tubercles of the inner part of the upper ones.
Applies only to lateral ones:
- the buccal distal cusp of the upper row is based in the space between the 6th and 7th molars of the lower row;
- the lateral elements of the upper row close with the lower ones in such a way that they fall strictly into the intertubercular grooves.
Let's find out together how dental impressions are made and what modern material is used.
Read here about the purpose of filing the front teeth.
At this address https://orto-info.ru/ortodonticheskoe-lechenie/podgotovitelnyiy-period/separatsiya-zubov.html we will talk about the consequences of teeth separation.
Methods used
Central occlusion is determined at the stage of manufacturing prosthetic structures when several units are lost.
This is necessary to ensure the normal functioning of the product and eliminate the occurrence of deviations and problems in the functioning of the temporomandibular joints.
In this case, the height of the lower third of the face is of great importance. However, in the absence of a large number of units, this indicator may be violated and must be restored.
If the patient has partial adentia, several options for determining the indicator are used.
The presence of antagonists on both sides
The method is used when antagonists are present in all functional areas of the jaws.
In the presence of a large number of antagonists, the height of the lower third of the face is maintained and fixed.
The occlusion index is determined based on as many contact zones as possible of the same units of the upper and lower rows.
This option is the simplest, as it does not require the additional use of occlusal ridges or specialized orthopedic templates.
Presence of three occlusion points between antagonists
This method is used if the patient still has antagonists in the three main contact zones of the rows. At the same time, the small number of antagonists does not allow normal positioning of plaster casts of the jaw in the articulator.
In this case, the natural height of the lower third of the face is disrupted, and occlusal ridges made of wax or thermoplastic polymer are used to correctly match the casts.
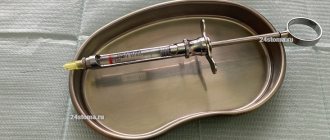
The roller is placed on the bottom row, after which the patient brings his jaw together. After the roller is removed from the oral cavity, imprints of the antagonist contact zones remain on it.
These prints are subsequently used by technicians in the laboratory to position the casts and create a fully functional and correct, from an orthopedic point of view, prosthesis.
Absence of antagonistic pairs
The most labor-intensive scenario is the complete absence of the same elements on both jaws.
In this situation, instead of the position of central occlusion, the central relationship of the jaws is determined .
The procedure includes the following steps:
- Work on the formation of a prosthetic plane , which is positioned along the chewing surfaces of the lateral units and is parallel to the beam. It is built from the lower point of the nasal septum to the upper edges of the ear canals.
- Determination of the normal height of the lower third of the face.
- Fixation of the mesiodistal relationship of the upper and lower jaws using wax or polymer bases with occlusal ridges.
Checking central occlusion with existing pairs of elements of the same name is carried out by closing the teeth and is carried out as follows:
- a thin strip of wax is placed on the already prepared and fitted contact surface of the occlusal roller and glued;
- the resulting structure is heated until the wax softens;
- heated templates are placed in the patient’s oral cavity;
- After bringing the jaws together, the teeth leave imprints on the wax strip.
It is these fingerprints that are used in the process of modeling central occlusion in the laboratory.
If, during the process of determining occlusion, the surfaces of the upper and lower rollers close, the specialist adjusts their contact surfaces.
Wedge-shaped cuts are made on the upper one, and a certain amount of material is cut off from the lower one, after which a wax strip is glued to the treated surface. After the rows are brought together again, the strip material is pressed into the cutouts.
The products are removed from the patient’s mouth and sent to the laboratory for subsequent production of a prosthesis.
Occluders and articulators. Central occlusion
Lesson 7.
Determining the height of the lower part of the face.
Methods for determining and fixing central occlusion. Occluders and articulators. Production of wax bases with occlusal ridges. Determination of the height of the lower part of the face
Anatomical method
– descriptive, the basis for determining the height is the restoration of the correct facial configuration based on the patient’s appearance (the degree of severity of the nasolabial folds, non-retraction of the lips, their calm closure)
Anthropometric method
– based on the principle of proportionality of the parts of a person’s face.
Zeising found a number of points that divide the human body according to the principle of the “golden section” ( The whole always consists of parts, parts of different sizes are in a certain relationship to each other and to the whole. GS - division of a continuous value into two parts in such a ratio that the smaller part relates to the larger as the larger to the whole size; the form, the construction of which is based on a combination of symmetry and the golden ratio, contributes to the best visual perception and the emergence of a sense of beauty and harmony.
Zeising did a colossal job. He measured about two thousand human bodies and came to the conclusion that the golden ratio expresses the average statistical law. The division of the body by the navel point is the most important indicator of the golden ratio. The proportions of the male body fluctuate within the average ratio of 13: 8 = 1.625 and are somewhat closer to the golden ratio than the proportions of the female body, in relation of which the average value of the proportion is expressed in the ratio 8: 5 = 1.6. In a newborn, the proportion is 1: 1, by the age of 13 it is 1.6, and by the age of 21 it is equal to that of a man.
The proportions of the golden ratio also appear in relation to other parts of the body - the length of the shoulder, forearm and hand, hand and fingers, etc. When the numbers expressing the lengths of the segments were obtained, Zeising saw that they constituted the Fibonacci series - a sequence of numbers in which each subsequent number is equal to the sum of the two previous numbers.) Finding these points on a person’s face is accompanied by complex calculations and constructions. It is made easier by using a Hering compass, which automatically determines the interalveolar height.
Determination method according to Wadsworth-White: equality of distances from the middle of the pupils to the line of closure of the lips and from the base of the nasal septum to the bottom of the chin.
The simplest way is to divide the face into 3 parts: upper, middle and lower. It is believed that with age the middle section remains relatively unchanged, with which the lower section is compared.
Anatomical and physiological
– determination of the height of the relative physiological rest of the lower jaw and the presence of a free interocclusal space. Methodology: the patient is involved in a conversation and asked to count. Upon completion, the lower jaw is set in the resting position of the masticatory muscles, and the lips, as a rule, close freely. In this position, the doctor measures the distance between two points marked on the skin at the base of the nasal septum and on the protruding part of the chin. Wax templates are then inserted into the mouth and the patient is asked to close them. The distance is measured again - it should be 2-3 mm less than the resting height.
Central occlusion – multiple fissure-tubercle contacts of the dentition with the central position of the TMJ heads in the articular fossae.
More:
- a state of relative physiological rest (minimal tone of the masticatory muscles and complete relaxation of the facial muscles; the occlusal surfaces of the teeth are separated by 2-4 mm)
- anterior occlusions (sagittal movements of the lower jaw)
- lateral occlusions (right and left)
— distal contact position of the lower jaw.
Signs of central occlusion
Basic:
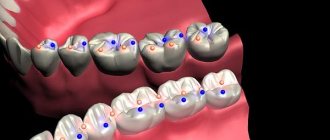
1) dental – closure of teeth with the greatest number of contacts
2) articular - the head of the condylar process of the lower jaw is located at the base of the slope of the articular tubercle of the temporal bone
3) muscular - simultaneous contraction of the temporal, masticatory and medial pterygoid muscles (muscles that lift the mandible)
Additional:
1) the midline of the face coincides with the line passing between the central incisors
2) the upper incisors overlap the lower ones by 1/3 of the crown (with an orthognathic bite)
3) each tooth has two antagonists: the upper one is of the same name and distal (except 11, 21), the lower one is of the same name and medially (except 38, 48)
The interalveolar height and the height of the lower third of the face are directly related to central occlusion. Interalveolar height is understood as the distance between the alveolar processes of the upper and lower jaws in the position of central occlusion. With existing antagonists, the interalveolar height is fixed by natural teeth, and if they are lost, it becomes unfixed and should be determined.
From the point of view of the difficulty of determining central occlusion and interalveolar height, A.I. Betelman identified four options for the difficulty of determining central occlusion:
- in the first option, when in the alveolar processes of the upper and lower jaws there are three or more pairs of antagonist teeth, located as follows: at least one in the anterior area, and the other two in the lateral areas. In this case, from the parameters of the central center position, as a rule, only the height is determined. Plaster models of prosthetic beds at the laboratory stage are compared in the CO position according to dental characteristics and facets of worn occlusal surfaces of antagonist teeth or using occlusal impressions;
- starting from the second variant of the complexity of determining the position of the CO, when less than three pairs of antagonists are located in the alveolar processes of the upper and lower jaws, it is necessary to first make bite templates at the laboratory stage and determine the position of the CO at the clinical stage.
And only then, using bite templates, compare models of prosthetic beds in the position of central occlusion (central ratio);
— the most difficult option for determining the position of the jaw CV is the third, when there is not a single pair of antagonists or they are located only in two areas of the jaws) and the fourth (with complete edentia) options for the location of dentition defects.
In the second, third and fourth variants of the location of defects in the dentition of the upper and lower jaws, in order to determine the position of the CS, it is necessary in all cases to always make bite templates
Determining central occlusion is one of the most important points in prosthetics. In case of complete absence of teeth, the central relationship of the jaws is determined.
Determining central occlusion (central relationship of the jaws) means determining the position of the lower jaw in relation to the upper jaw in three mutually perpendicular planes: sagittal, vertical and transversal.
That is, the doctor must convey to the dental technician as accurately as possible the conditions that this particular patient has.
In everyday practice, an anatomical and physiological method is used to determine central occlusion (central relationship of the jaws)
. The physiological basis of this method is the fact that the occlusal height is 2-4 mm less than the height of relative physiological rest.
The doctor acts as follows:
- a wax base with an occlusal roller is made. In it, the basis is the basis of the future prosthesis. And the roller is the future teeth.
- The upper base is put on and the occlusal ridge is formed as follows: The upper lip does not protrude or recess. Depending on the length of the upper lip, the edge of the upper lip can protrude from under it by 2 mm, be at its level, or be located above the edge of the upper lip by 2 mm. In general, the cutting edges of the upper central incisors, when the mouth is closed, coincide with the line where the lips close, and when speaking, they protrude from under the edge of the upper lip by 1-2 mm. A person looks older than his age if the cutting edges of the upper incisors are not visible when smiling. The height of the upper occlusal ridge is determined based on these considerations. Having inserted the template into the oral cavity, the patient is asked to close his lips - the line of closure is marked on the roller. Check the height of the roller with the mouth half open - the edge should protrude by 1-2 mm.
- A prosthetic plane is formed on the upper roller (a plane that imitates the cutting edges and occlusal surface): in the frontal section, the prosthetic plane is formed parallel to the pupillary line, in the lateral sections - parallel to the nasal line (Kamper's horizontal). To do this, take two rulers: one is installed on the occlusal surface of the roller, the other on the pupillary line (frontal section) and the nasal line (base of the wing of the nose - the middle of the tragus of the ear) line (lateral section). Check the parallelism of the rulers and adjust the rollers if necessary.
- The height of the lower part of the face in a state of relative physiological rest is determined (it is approximately equal to the height of the middle part of the face). To determine the state of relative physiological rest, anatomical landmarks are also used: the lips close freely, without tension, the nasolabial and chin folds are slightly pronounced, the corners of the mouth are slightly lowered.
- The height of the lower part of the face in the position of central occlusion is approximately calculated (height at rest minus 2-4 mm).
- Wax bases with rollers are inserted into the mouth and the lower roller is adjusted to the upper one until the calculated height of the lower part of the face in the position of central occlusion is achieved.
- The central occlusion is fixed (the rollers are fastened to each other).
- Anatomical landmarks are drawn, indicating to the technique how to place artificial teeth: The median line is drawn as a continuation of the central line of the face, the canine line is drawn vertically from the wings of the nose, the horizontal line is drawn along the border of the upper lip when smiling.
- The bases are put on the model and, fastened, sent to the laboratory.
ADD.1 Making wax templates with bite ridges in the absence of teeth.
Methodology:
1. Using a warm spatula, cut off a piece of wax from the plate to the required size according to the model.
2. Wet the model with water.
3. Heat the cut strip of wax on one side.
4. Place the reverse unmelted side on the model.
5. Very precisely press the model with your fingers, starting on the upper jaw from the palate, and on the lower jaw - from the lingual side and then outward.
6. Strengthen the bases with orthodontic wire with a diameter of 0.8 mm and a length of 2 cm, bending it along the inside and in the shape of the alveolar processes, heat it and immerse it in the base, adding boiling water.
7. Heat the second strip of wax and roll it tightly into a roller.
8. Attach the resulting roller strictly in the center of the alveolar process to the wax template.
9. Using boiling wax, pour the roller onto the base, forming vertical vestibular surfaces, adhering to the dimensions: height - 1.5 cm, width = 1 cm.
10. Make the surface of the rollers smooth, and create a bevel in the distal sections.
11. Trim the wax base along the appropriate boundaries.
12. Remove the wax from the model and smooth it along the edges.
Requirements for bite pads:
1. The boundaries of the wax templates must correspond to the boundaries of the dentures.
2. Templates must fit tightly to the models.
3. The wax roll should be located strictly in the middle of the alveolar process, the width in the frontal area is 0.8 - 1.0 mm, in the lateral area 1 - 1.5 cm.
Methodology for determining the central relationship of the jaws in the complete absence of teeth on both jaws:
1. Check that the wax templates with bite ridges meet the requirements.
a. The boundaries of the wax templates should correspond to the boundaries of the dentures.
b. The templates must fit snugly to the models.
c. The wax roll should be located strictly in the middle of the alveolar process, the width in the frontal area is 0.8 - 10.0 mm, in the lateral area 1 - 1.5 cm, 2 - 3 mm above the remaining teeth.
2. Determine the interalveolar height using an anatomical and physiological method:
a. Use paper or a ruler. An arbitrary point is placed on the patient’s chin.
b. Then, in a state of physiological rest, this point is transferred to a piece of paper or a ruler.
c. On a ruler or paper, subtract from 1 to 4 mm, depending on the age of the patient (the tone of the masticatory muscles), to obtain the height of the bite.
3. Using a dental spatula, trim the frontal section of the upper bite ridge parallel to the pupillary line, ensuring that it is 0.5 - 1 mm below the edge of the upper lip.
4. The lateral sections of the bite ridge are trimmed parallel to each other and the tragonasal line.
5. We make locks on the surface of the roller.
6. We trim the lower bite ridge, ensuring its contact along the entire plane with the upper ridge; the height of the ridges should correspond to the height of physiological rest (i.e. 2 - 3 mm above the bite height) - we control it with a ruler.
7. Using a dental spatula and an alcohol burner, heat the bite ridges by 2–3 mm.
8. Heated bite ridges are inserted into the oral cavity and close the dentition in a position of central occlusion.
9. After the wax hardens and checks that the height of the bite and the central relationship of the jaws are correctly fixed, approximate lines are applied to the rollers: midline, line of teeth closure, canine line, smile line.
10.Wax templates are removed from the oral cavity.
Requirements for bite ridges after determining central occlusion:
1. The bite ridges should fit snugly on the models.
2. The bite ridges must be securely glued together.
3. The bite ridges must securely fix the models in the position of central occlusion.
4. Indicative lines must be clearly drawn on the bite ridges: midline, teeth closure line, canine line, smile line.
ADD.2
use wax templates with bite ridges or, as they are sometimes called, occlusal ridges. On plaster models, along the boundaries marked with a chemical pencil, templates or bases are first made from dental wax. In the area of dentition defects, rollers are installed, the width of which in the lateral sections should be no more than 1-1.2 cm, and in the area of the front teeth - 0.6-0.8 cm. The height of the rollers in the area of the front teeth is approximately 1.5 cm , in the area of the molars is 0.8 cm and should be 1-2 mm greater than the height of the teeth. And the occlusal surface is formed approximately along the occlusal plane of the entire dentition.
With a fixed bite and the presence of antagonists at the occlusal ridge, central occlusion is determined as follows. Wax templates with bite ridges are treated with alcohol, rinsed in cold water, inserted into the mouth and the patient is asked to slowly close his teeth. If the rollers interfere with the closure of antagonist teeth, determine the amount of separation of the teeth and cut off the wax by approximately the same amount. If, when the teeth are closed, the ridges are separated, then, on the contrary, wax is layered on them until the teeth and ridges are in contact. The position of central occlusion is assessed by the nature of the closure of the teeth, typical for each type of occlusion. To accurately establish the lower jaw in centric relation, special functional tests are used. The best results are obtained by swallowing. However, in some patients with restless behavior it is useful to secure this test as follows. Before asking the patient to swallow, it is necessary to relax the muscles that lower and raise the lower jaw. To do this, the patient is asked to open and close his mouth several times, relaxing the muscles as much as possible. At the moment of closing, the lower jaw should move easily, and the teeth should be set exactly in the position of central occlusion. After preliminary training and achievement of the usual closure, strips of wax are placed on the occlusal ridges, glued to the roller and heated with a hot dental spatula. Wax rollers with bases are inserted into the oral cavity and the patient is asked to close his teeth in the same way as during training, i.e. the muscles that lift the mandible should be relaxed, and in the final closing phase the patient should make a swallowing movement. On the softened surface of the wax, impressions of the teeth of the opposite jaw are obtained, which serve as a guide for establishing plaster models in the position of central occlusion.
If the antagonists are the occlusal ridges of the upper and lower jaws, you should first achieve simultaneous closure of the teeth and ridges by first cutting or layering the wax. It is necessary to pay attention to the location of the occlusal plane of the ridges. It must coincide with the occlusal plane of the dentition or be a continuation of it. The occlusal plane of the ridges is a guideline when modeling the closure surface of prostheses. After determining the height of the ridges, on the occlusal surface of the upper ridge I make “?: wedge-shaped cuts at an angle to each other. A thin layer of wax is cut off from the bottom roller and a new, preheated strip is glued in its place. The patient is asked to close his teeth, controlling the accuracy of setting the lower jaw in the position of central occlusion. The heated wax of the lower roller fills the cuts on the upper one and takes the form of wedge-shaped protrusions. The rollers are removed from the mouth, cooled, the clarity of the resulting prints is assessed and reinserted into the mouth to control the accuracy of determining the central relationship of the jaws. If the projections enter the wedge-shaped notches, and the signs of closure of the teeth correspond to the position of the central occlusion, therefore, the clinical approach satisfies all the necessary requirements. Once convinced of this, the doctor removes the rollers from the oral cavity, cools them and places them on the model. Before plaster placement in the articulator, the models are made in the position of central occlusion and the resulting relationship is compared with the nature of the closure of the teeth in the oral cavity. Having once again verified the accuracy of the manipulations performed, the models are fixed in the articulator for the further stage of manufacturing a partial removable laminar denture.
The technician fixes the models into an articulator or occluder.
An occluder is a device that reproduces only the vertical movements of the lower jaw (opening and closing the mouth).
Occluders consist of two wire or cast frames, hingedly connected to each other. The lower frame is curved at an angle of 100 - 110 degrees and imitates the angle and ramus of the lower jaw. In the rear section of the frame there is a platform for resting the pin that holds the interalveolar height.
The upper frame is located in a horizontal plane and has a vertical pin that rests against a platform on the lower frame. The models are plastered into the occluder as follows.
Preparing the model for plaster: making cuts on their base and soaking in water, create a pile of plaster on the table, lower the lower frame of the occluder into it, and, having covered it completely with plaster, place the models in the space of the occluder. In this case, pay attention to the position of the models relative to the front edge of the occluder frames, its midline and the plane of the table. Having covered the lower model with plaster, create a mound of plaster on the base of the upper model and lower the upper frame of the occluder. If the bite height is not fixed, it is necessary to ensure that the height pin is supported on the platform of the lower frame of the occluder. When the plaster hardens, cut off its excess, remove the wax strips holding the models together, and open the occluder. Then the wax bases with occlusal ridges are removed, and the relative position of the models in the central occlusion remains fixed in the occludator.
Articulators are mechanical devices that are designed to reproduce the movement of the lower jaw relative to the upper jaw.
There are various articulators, but they are all divided into four main types:
- simple articulated articulators;
- average anatomical or linear-planar;
- semi-adjustable;
- fully adjustable or universal.
In a simple hinge articulator, only hinge movements can be performed, and any lateral movements are excluded. Therefore, it is possible to use such an articulator only as a visual aid for students.
In average anatomical articulators, the value of the articular and incisal angles is fixed. You can change the relationship of the incisors, but there is no way to adjust the lateral displacements. Medium anatomical articulators can be used for the manufacture of single crowns and, if necessary, for the manufacture of a complete removable denture for edentulous jaws.
The mid-anatomical articulator from Girrbach has a fixed Benet angle of 20* and a fixed angle of the sagittal articular path of 35*.
Semi-adjustable articulators allow adjustment of the Bennett angle and the sagittal joint path angle. The intercondylar distance is usually 110 mm. Semi-adjustable articulators contain mechanisms that reproduce articular and incisal paths, which can be adjusted based on average data, as well as individual angles of these paths obtained from patients.
Fully adjustable or universal articulators - adjusted to individual jaw position data, which is transferred to the articulator using a facebow.
9
Calculations for orthopedic purposes
In the process of creating prosthetic structures for malocclusion, an orthopedic specialist takes measurements of the heights of the lower third of the patient’s face using an anatomical and physiological method.
To do this, the height of the bite is measured in a state of complete reduction of the jaws, with central occlusion and in a state of physiological rest.
Payment procedure:
- At the lowest point of the nose , at the level of the nasal septum, the first mark is placed strictly in the center. In some cases, the specialist places a mark on the tip of the patient's nose.
- in the center of the chin , in its lower zone.
- Between the applied marks, the height is measured in the state of central occlusion of the jaws. To do this, bases with bite ridges are placed in the patient’s oral cavity.
- Repeated measurements are taken between marks , but in a state of physiological rest of the lower jaw. To do this, the specialist must distract the patient so that he really relaxes. In some cases, the patient is offered a glass of water. After a few sips, the muscles of the lower jaw really relax.
- The results are recorded. However, the standardized indicator of normal bite height, which is 2-3 mm, is subtracted from the height at rest. And if after this the indicators are equal, we can talk about normal bite height.
If, when measuring height, the calculation results yield a negative result, the lower third of the patient’s face is underestimated . Accordingly, if the result deviates in a positive direction, the bite is overestimated .
What is the significance of teleradiography in orthodontics, and what is revealed with its help.
In this publication we will talk about diagnostic methods in orthodontics.
Here https://orto-info.ru/ortodonticheskoe-lechenie/podgotovitelnyiy-period/miogimnastika.html you are offered myogymnastics exercises used in orthodontics.
General overview
The technique for constructing the bite height is based on determining the intermaxillary distance when the dentition is closed. The indicator under consideration is of significant importance, determining how correct the anatomical structure of the jaw and the position of the teeth are.
A change in the height of the bite, caused by the loss of one or more units, or a displacement of the central axis, leads to a disruption of the natural balance, and entails associated disorders, which include:
- Recession of lips;
- Deepening of nasolabial folds;
- Advancement of the mandibular region;
- Reducing the height of the lower part of the face.
In addition to disrupting aesthetics, such defects act as negative factors that complicate orthodontic and orthopedic treatment.
Techniques for correct positioning of the lower jaw
Correct positioning of the patient's jaw in the position of central occlusion involves the use of two methods of placement: functional and instrumental.
The main condition for correct placement is muscle relaxation of the jaw muscles.
Functional
The procedure for carrying out this method is as follows:
- the patient moves his head back slightly until the neck muscles tense, which prevents protrusion of the jaw;
- touches the tongue to the back of the palate, as close to the throat as possible;
- at this time, the specialist places his index fingers on the patient’s teeth, lightly pressing on them and at the same time slightly moving the corners of the mouth in different directions;
- the patient imitates swallowing food, which in almost 100% of cases leads to muscle relaxation and prevents jaw protrusion;
- When bringing the jaws together, the specialist touches the surfaces of the teeth and holds the corners of the mouth until it is completely closed.
In some cases, the procedure is repeated several times until complete muscle relaxation and correct reduction of both rows are achieved.
Instrumental
It is performed using specialized devices that copy jaw movements. It is used only in extremely serious situations, when bite deviations are significant and it is necessary to correct the position of the jaw using the physical efforts of a specialist.
Most often, when carrying out this method, the Larin apparatus and special orthopedic rulers are used, which make it possible to record jaw movements in several planes.
Errors allowed
Creating a prosthetic structure in conditions of malocclusion is a most complex orthopedic procedure, the quality of which depends 100% on the qualifications of the specialist and a responsible approach to work.
Violations in determining the position of central occlusion can lead to the following problems:
The bite is too high
- The folds of the face are smoothed, the relief of the nasolabial zone is poorly defined;
- the patient's face looks surprised;
- the patient feels tension when closing the mouth, while closing the lips;
- the patient feels that during communication the teeth are knocking against each other.
Low bite
- The folds of the face are strongly pronounced, especially in the chin area;
- the lower third of the face visually becomes smaller;
- the patient becomes like an elderly person;
- the corners of the mouth are lowered;
- lips sink;
- uncontrolled salivation.
Permanent anterior occlusion
- There is a noticeable gap between the front incisors;
- the lateral elements do not contact normally, tubercle reduction does not occur.
Permanent lateral occlusion
- Overbite;
- clearance on the offset side;
- shifting the bottom row to the side.
Reasons for such problems
- Incorrect preparation of wax templates.
- Insufficient softening of the material for taking impressions and impressions.
- Violation of the integrity of wax forms due to their premature removal from the oral cavity.
- Excessive jaw pressure on the ridges during impression taking.
- Errors and violations on the part of the specialist.
- Errors in the work of the technician.
The video provides additional information on the topic of the article.
Factors of abnormal development
Among the factors that can cause a change in the natural height of the bite are:
- Increased abrasion of tooth enamel;
- Chronic bruxism;
- Incorrect distribution of load on the jaw apparatus;
- Partial or complete edentia;
- Metabolic disorders and demineralization of bone tissue;
- Mistakes made during dental prosthetics.
Identifying the original source of the problem is an important point on which the effectiveness of the chosen treatment method depends. When planning prosthetics, it is necessary to conduct a comprehensive examination of the maxillary region.