1645
The safety and well-being of the patient during and after dental procedures force each clinic to introduce the latest technologies and modern materials into the work of doctors.
Of the latest developments in strengthening and restoring teeth, most dentists prefer the GlassSpan system.
What is "Glasspan"
GlasSpan (“Glasspan”) is a flexible tape based on ceramics and composite, which serves to unite teeth, that is, direct splinting. Produced by the company of the same name GlasSpan. The tape is compatible with all dental materials, resistant to moisture, and has no taste or odor. In addition, the width of various modifications of the tape does not exceed 3 mm, which allows it to remain invisible in the oral cavity, but at the same time perform its function properly.
Interesting! This product is produced in glass capsules in several versions: in the form of a tape (width no more than 2 mm), in the form of a small cord (width 1 mm), medium (width 1.5 mm) or long (width 2 mm). The length of all products of the Glasspan system is 27 cm. But, logically, it is cut into pieces - in accordance with how much a particular patient requires.
Aesthetic adhesive splinting in therapeutic dentistry
I. K. Lutskaya
Doctor of Medical Sciences, Professor BelMAPO (Minsk)
N. V. Novak
Ph.D., Associate Professor BelMAPO (Minsk)
In complex periodontal treatment, an important step is the immobilization of mobile teeth using various splinting methods. Currently, materials differing in their chemical composition are widely used as reinforcements: glass fibers, ceramic fibers, polyethylene fibers.
The direct method is carried out directly in the oral cavity; indirect method - on a model in laboratory conditions. Extracoronal splinting is a method without preparation of hard tooth tissues (the enamel surface is only lightly processed with an abrasive instrument to remove the non-prismatic layer of enamel and etched with acid to create micro-roughness). Intracoronal splinting involves the preparation of hard tooth tissues (recesses are formed on the oral, vestibular or chewing surface, into which reinforcement is placed and covered with a composite material).
Splinting teeth with the 1st degree of mobility does not require the formation of a special groove, and with the 2nd-3rd degree of mobility a groove with a depth of 1-1.5 mm is formed. When splinting lateral teeth, a depression is always created on the chewing surface. For immobilization of the upper central teeth, the intracoronal method is preferable. Splinting is not recommended for patients with poor oral hygiene.
Regardless of the chosen method of manufacturing the restoration, before splinting it is necessary to carry out a full range of professional oral hygiene measures. The design of the splint must include sufficiently stable teeth so that they can support the functionally and morphologically weakened periodontium of mobile teeth. Splinting of premolars and molars should eliminate mobility in the mesiodistal direction and partially reduce it in the buccolingual direction. Splinting of incisors should reduce mobility in the vestibulo-oral direction.
The advantage of adhesive splints is that there is no need for significant excision of dental tissue. The splinting procedure takes place in one visit. Ensures reliable stabilization of teeth over a long period of time. Acceptable strength is due to good bonding of the tape fibers with the composite. The color of the structures meets the aesthetic needs of patients. The small volume does not create discomfort. The interdental spaces remain open, which is important for maintaining good hygiene and for accessing periodontal pockets. If there is a defect in the dentition, adhesive splints are capable of supporting an artificial tooth.
When planning a splint design, it is necessary to consider the capabilities of reinforcing fibers and manufacturing technologies. Materials are distinguished by composition: metal; polyethylene (Ribbond, Connect, Construct); ceramics (GlasSpan, Cerec), pressed ceramics; fiberglass (Fabre-splint, Splint-it, Fibre-Kor, Vectris, EverStick, TENDER FIBER); high-strength threads (GrandTEC, Kevlar, Armrs). Fiber systems, in turn, can be filled (Fibre-Kor, Splint-it, EverStick, Construct, GrandTEC, TENDER FIBER) and unfilled (Ribbond, Connect, Fabre-splint, GlasSpan).
The strength of fixation of the adhesive structure significantly depends on the method of applying the tape. In turn, the aesthetics of the restoration requires an optimal choice of composite material, including simulating the optical properties of “white” enamel and “pink” gums. We provide specific clinical examples of the manufacture of aesthetic adhesive dentures with varying degrees of tooth mobility.
Clinical case No. 1
Aesthetic defect in the area of the upper incisors due to the displacement of the 21st tooth, slight mobility of the teeth. The treatment plan includes selective grinding of the incisors, production of a splinting fiber adhesive structure supported on teeth 22, 21, 11, 12. Since the splint will be located on the palatal surface, there is no choice of shades of the composite.
Odontometry consists of measuring the height of the central incisors (Fig. 1).
Rice. 1. Measuring the height of the central incisors.
The supporting teeth are cleaned of plaque with fluoride-free paste Klint (VOCO), washed with water, and dried.
The preparation is carried out with a medium-grain spherical bur using water cooling: grooves are created on the lingual surfaces of the upper incisors with a width of about 2.0 mm and a depth of up to 1.0 mm.
The length of the future prosthesis is measured using a strip of foil, which is placed in the groove along the supporting teeth and pressed with a tool into the interdental spaces. In accordance with the obtained length, a piece of Ribbond polymer tape is prepared.
Within 30 seconds, the prepared areas of the intracoronal splint bed are etched with acid gel (Fig. 2). The gel is thoroughly washed off with distilled water for 30 seconds from each tooth, which are then dried with air.
The adhesive system is applied with a special brush, rubbed in for 30 seconds, distributed evenly with a stream of air, and then polymerized with the light of a halogen lamp on each tooth separately for 20 seconds (Fig. 3).
The prepared piece of tape is impregnated with adhesive throughout its entire length, and then quickly, so that the composite does not have time to harden, it is placed in the grooves on the palatal surfaces of the supporting teeth, starting with the 22nd tooth, successively pressed into the interdental spaces, and pressed against the dentin (Fig. 4). Excess composite is removed from the interdental spaces. Each section is polymerized separately. Careful grinding and polishing of the palatal surfaces of the supporting teeth is carried out with various occlusal movements.
The cutting edge of the 11th tooth is ground from the center to the mesial surface by 0.1 mm, and the cutting edge 21 by 0.2-0.5 mm in the direction from the distal to the mesial angle. The prepared areas are thoroughly polished. Then all free surfaces of the teeth included in the structure are covered with fluoride varnish, which is also used to treat the cutting edges of the central incisors (Fig. 5).
Fig.2. Acid etching of enamel. Rice. 3. Applying adhesive to the etched surface. Rice. 4. Modeling a tire with Ribbond tape. Rice. 5. Splinted and polished teeth.
Clinical case No. 2
The displacement of the upper central incisors led to the formation of a diastema, loss of contact between teeth, asymmetry, and exposure of the roots. Uneven abrasion of enamel and dentin is noted (Fig. 6). Splinting of the front teeth is required. In addition, restoration of the incisors is expected, so planning the size, shape, and relief, including odontometry and odontoscopy, is important.
Odontometry revealed asymmetry in the vertical and transverse dimensions of the central incisors. The shape of the crowns approaches triangular. The opposite sign of belonging to the side is expressed: the distal angle is sharper than the mesial one.
Based on the initial condition of the anterior teeth, restoration planning includes increasing the vertical dimension 11, closing the diastema, reconstructing the signs of belonging and the symmetry of the arrangement of elements of dental morphology.
After mechanical cleaning of the teeth with a fluoride-free paste on a neutral background, the shades of the enamel and opaque composite are selected in accordance with the color of the central area of the tooth, gingival and mesial sections.
The absence of opaque would make the design “transparent”. Enamel and clear shades are required to cover the main area of the restoration, the incisal edge and proximal surfaces.
By grinding off the protruding areas with corundum heads, the cutting edges of teeth 11 and 21 are smoothed. Cylindrical diamond burs are used to prepare the mesial surfaces of the incisors to correct signs of the crown angle and reconstruct the contact between the teeth. The interested sections of the vestibular surface of teeth 11 and 21 are smoothed with a fine-grained diamond bur for subsequent modeling of the restoration.
A groove 2.0 mm wide and 1.0 mm deep is formed on the palatal surface of the incisors and canines slightly below the equator.
A strip of foil of the required size is cut, and then a piece of Ribbond is prepared of the same length as the strip of foil.
Acid etching of the prepared teeth is carried out with Vococid gel for 30 seconds, then the surface is treated with an adhesive (polymerized with light). The flowable composite (without curing) is applied in portions to each tooth separately.
The tape, impregnated with adhesive in the area corresponding to the 13th tooth, is placed in the groove. To avoid displacement, Ribbond is pressed against the tooth with a tool and pressed into the interdental space, following the contours of the teeth. The part of the tire covered with the composite polymerizes. A portion of the flowable composite is introduced into the groove of the 12th tooth. A tape impregnated with adhesive is applied to this area, and this area is photopolymerized separately in the same way. They move sequentially from one tooth to another. Then a little composite is applied to the edges of the splint, the material is smoothed towards the gum and incisal edge. The splint is polymerized on both sides (lingual and vestibular), each tooth for 30-40 seconds (Fig. 7).
Next, a step-by-step reconstruction of the frontal part of the dentition is carried out. The prepared surfaces of the incisors are treated with an adhesive bond. The latter is cured by the light of a halogen lamp. One by one, a thin layer of opaque is applied to the central surface of the incisors being restored and carefully smoothed. The sign of the crown angle is reproduced using opaque photopolymer. Considering the type of transparency of the enamel, the opaque is not brought to contact between the teeth by 0.5 mm. As a result, the triangular geometric shape of the teeth is converted to square (Fig. 8).
The entire surface of the restoration is covered with a basic enamel tone and then a transparent layer, and a smooth cutting edge is modeled. The central contact between the incisors is restored. The gingival interdental space is closed with enamel polymer (Fig. 9).
Processing is carried out with diamond tools. Polishing is performed using discs and felt heads. The teeth are coated with fluoride varnish.
Rice. 6. Dental defects. Rice. 7. Tape fixed on the palatal surface of the teeth. Rice. 8. Modeling of the vestibular surface. Rice. 9. Completed restoration.
Clinical case No. 3
The aesthetic defect is caused by displacement of teeth and exposure of roots. Upon examination, gum recession is determined in the area of the 11th and 12th teeth, the presence of a trema, and a poor-quality filling in the gingival region of the lateral incisor on the right. Dental plaque is eliminated through professional, individual hygiene.
A splinting structure is required, involving a group of teeth supported by stable teeth 13 and 23, restoration of the 12 and gingival margin of the 11 tooth.
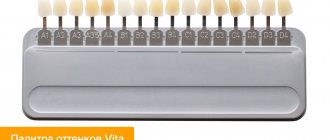
After mechanical treatment of the tooth surface with fluoride-free paste, the shade of the composite is determined. Opaque and enamel syringes are selected for the gingival and lateral areas of the tooth by comparing standards with the corresponding sections of the incisors.
Gum color is assessed using pink shade standards for the Amaris Gingiva (VOCO) material. To do this, opaque standards are brought close to the gum and compared with the color of the mucous membrane.
Planning involves odontometry and odontoscopy of the 11th tooth to select the size and shape of the restoration: assessment of the severity of the sign of deviation of the gingival dome on the symmetrical 21st tooth, a drawing of the gingival contour of the tooth, as well as the relief of the gingival margin and interdental papillae (Fig. 10). The shape of the vestibular surface of the teeth is planned to be triangular.
Rice. 10. Measuring the vestibular dimensions of the central incisor. The 11th tooth is formed along the neck. Fig. 11. Cured splint on the palatal surface of the teeth. Rice. 12. Contour of pink opaque on the 11th tooth. A band is visible in the diastema area. Rice. 13. Modeling of “pink gums”. Rice. 14. Completed restoration.
Additionally, using carbon paper, the occlusal contacts and contours of the future restoration are assessed for optimal tooth preparation and band placement. The tooth-splint boundary should not fall on occlusion points.
The 11th tooth is prepared, which includes the removal of exposed cement and thinning of the root dentin to the thickness of the future restoration. A small spherical bur forms a groove along the anatomical neck of the tooth, repeating the shape of the latter (see Fig. 12).
The preparation of areas of the 12th tooth that require restoration is also carried out: the lateral surfaces and the carious defect are processed with a medium-grain diamond bur.
A groove for the splint is formed on the lingual surface of the front teeth using a diamond ball-shaped bur with a diameter of 2.0 mm. The length of tape required for splinting is measured. To determine the length of the Ribbond, a narrow strip of foil is placed on the teeth in the area of the intended splint. Using a tool, the foil strip is pressed into the interdental spaces so that it fits tightly to the teeth, following their contours. A strip of foil of the required size is cut, and then a piece of Ribbond is prepared the same length as the resulting strip of foil.
Vococid gel is applied for 30 seconds on all prepared areas of enamel and 15 seconds on dentin. The acid is washed off with a stream of water for 30 seconds. The enamel surface is thoroughly dried and the dentin surface is lightly dried to meet the requirements of wet bonding.
The inner surface of the bed for the splinting structure is also subjected to total acid etching. The gel is removed, the teeth are washed with water, and dried with a stream of air. First, an adhesive bond is applied to the surface of the groove of each tooth (polymerized by the light of a halogen lamp), and then a flowable composite (without curing).
Ribbond tape, impregnated with adhesive (not cured), is placed in the furrow. To avoid displacement, the tape is pressed with a smoothing iron sequentially to each tooth and pressed into the interdental spaces with a tool, following the contours of the teeth. A little composite is applied to the edges of the splint and smoothed towards the gum and incisal edge. The splint is polymerized on both sides (lingual and vestibular): on each tooth for 30-40 seconds. Polishing of the structure is carried out in accordance with the requirements for surface treatment of the composite (Fig. 11).
The next step is modeling the artificial gum with pink shades of polymer. Using a thin instrument (file), the previously selected pink opaque is carefully applied along the planned gingival contour (Fig. 12).
The exposed part of the root is covered with Amaris Gingiva opaque composite (Fig. 13). The pink material is applied in an even layer to the distal surface of the root of tooth 11 and to the mesial area of 12, thus closing the interdental space in the gingival area.
At the same time, the shape of the gingival papilla is modeled, corresponding to the symmetrical area. The natural shine is subsequently achieved by applying a transparent pink photopolymer.
Closing the trema begins with the application of a layer of dentin composite to the lateral surfaces of the 11th and 12th teeth. Each batch is cured with halogen light. At the same time, filling of the defect in the hard tissues of the lateral incisor is carried out. The opaque layer is not brought to the level of the vestibular arch and to the line of distal interdental contact by 0.5 mm.
The remaining volume of the defect is filled with enamel composite. A light-transmitting layer covering all surfaces, 0.5 mm thick, gives the structure a natural shine and transparency (Fig. 14).
The surfaces of the restoration and the splint are ground and polished to a natural shine. The teeth are coated with fluoride varnish.
Clinical case No. 4
There is mobility of the central and chewing teeth in the upper jaw. The roots of the incisors and premolar canines are exposed up to 1/3 and have wedge-shaped defects (Fig. 15). Splinting is indicated, which will involve the entire dentition.
Using a brush and fluoride-free paste (Klint, VOCO), all surfaces of the teeth included in the splint are thoroughly cleaned.
The bare surface of the roots of the upper incisors, canines and premolars is prepared with a small spherical bur in the form of a groove, the width corresponding to the tape used for splinting. In this case, the groove goes around the entire neck of each tooth.
To determine the required length of Ribbond, a narrow strip of foil is placed on the surface of the teeth in the area of the future splint, starting from the premolar, which closes the dentition, and completely encircling the neck of the most mobile teeth, so that the strip fits tightly to the teeth, following their contours. This way the required length is determined. The Ribbond (2.0mm wide) is then cut to exactly the same length as the foil strip. The tape is placed on a clean plate under the cover until use. Further work is carried out in the patient’s oral cavity.
The prepared areas of the teeth are etched with acid gel for 30 seconds, rinsed with a stream of water and dried, then covered with adhesive. The latter is polymerized with halogen light. A thin layer of flowable Amaris flow (VOCO) composite (without polymerization) is applied to the surface of the adhesive-treated enamel. Subsequent stages are performed without light from the lamp, which prevents premature curing of the material.
A piece of Ribbond tape measured for the tire is moistened with an adhesive bond. Using a trowel, the edge of the tape is pressed through the composite layer to the prepared vestibular surfaces of the premolar and canine. The Ribbond tool is pressed into the interdental spaces so that the tape goes around the necks of the teeth and passes onto the lingual surface of the lateral and central incisors (Fig. 16). The tape continues to be pressed tightly against the tooth, passing it along the necks of the 12th and 11th teeth from the palatal surface. Since the left central incisor has pronounced mobility, it is fixed with a loop, adapting the reinforcing tape first on the palatal surface, then distal, vestibular, mesial and again palatal, moving through the interdental space to the palatal area of the adjacent 22 tooth (Fig. 17). Next, Ribbond is again transferred to the vestibular surface of the canine and premolar, which have wedge-shaped defects, sequentially moving from one tooth to another, with the restoration completed on the chewing surface of the molar (Fig. 18). After adapting the tape, a thin layer of enamel composite is applied to the entire surface of the splint and smoothed with a large ball-shaped plugger in the direction of the gum and incisal edge of the splint. The material polymerizes on the lingual and vestibular sides, on each tooth for 30-40 seconds. Then the diastema and trema are closed with filling material, forming contacts.
The tire surface is processed using fine and ultra-fine grain diamond burs, polishing discs, and heads. The left central incisor is shortened, focusing on a symmetrical tooth. In order to reduce marginal permeability, the surfaces of the roots and crowns of the teeth are coated with fluoride-containing varnish (Fig. 19 a, b).
Rice. 15. Movable teeth with exposed roots. Rice. 16. Strengthening the tape on the canine and lateral incisor. Rice. 17. Section of the tire with the included cutter. Rice. 18. General appearance of the tire. Rice. 19a. Restored dentition from the palatal surface. Rice. 19b. Restored dentition from the vestibular surface.
Clinical case No. 5
There is mobility of the central and lateral incisors on the lower jaw. The teeth have wedge-shaped defects. The roots of the incisors and premolar canines are exposed to 1/3, missing 33. Splinting is indicated, which will involve the central group of teeth and premolars. In addition, it is planned to restore 33 using adhesive tape.
Using a brush and Klint fluoride-free paste (VOCO), all surfaces of the teeth included in the splint are thoroughly cleaned.
The bare surface of the roots of the lower incisors, canines and premolars is prepared with a spherical bur in the form of a groove that goes around the vestibular neck of each tooth, the width corresponding to the tape that is used for splinting (Fig. 20). Wedge-shaped defects are also used as a bed for an adhesive structure.
Using special standards, opaque and enamel shades of the composite are selected to form the missing premolar. Dimensions, shape, relief are planned in accordance with the symmetrical tooth.
Before determining the required length of Ribbond, a narrow strip of foil is applied to the surface of the teeth in the area of the future splint (from 35 to 45), so that the strip completely goes around the neck of each tooth, fits tightly to the teeth, following their contours. This way the required length is determined. The Ribbond (2.0mm wide) is then cut to exactly the same length as the foil strip. The tape is placed on a clean plate under the cover until use. Further work is carried out in the patient’s oral cavity.
The prepared areas of the teeth are etched with acid gel for 30 seconds, rinsed with a stream of water and dried, then covered with adhesive (Fig. 21). The latter is polymerized with halogen light. A thin layer of flowable composite (without polymerization) is applied to the surface of the enamel treated with adhesive.
A piece of Ribbond tape measured for the tire is moistened with an adhesive bond. The edge of the tape is adapted with a trowel through the composite layer to the prepared distal, then the vestibular surface of the premolar that closes the splint (Fig. 22). The Ribbond tool is pressed into the interdental spaces so that the tape completely goes around the necks of the teeth (Fig. 23). Ribbond is used sequentially to further form the splint, moving from one tooth to another (Fig. 24). After adapting the tape, layers of opaque and enamel composite are applied to the entire surface of the tire (Fig. 25). Then the material is polymerized on the lingual and vestibular sides, on each tooth for 30-40 seconds.
Subsequent work resembles the formation of a veneer, and therefore requires compliance with the basic stages of working with the composite. In the area of the missing 33rd tooth, a dark opaque layer is applied to the tape most deeply (closer to the cervical area). The next dentin layer, lighter, occupies a larger area and replenishes the volume of dentin present in the tooth. The restoration is completed with enamel colors, recreating the optimal size, shape and relief of tooth 33 in accordance with parameters 43.
The tire surface is processed using fine and ultra-fine grain diamond burs, polishing discs, and heads. In order to reduce marginal permeability, the surfaces of the roots and crowns of teeth are coated with fluoride-containing varnish (Fig. 26).
Thus, a differentiated approach to the selection of means and methods of adhesive splinting of teeth makes it possible to stabilize them in the dentition,, if necessary, change the shape of the teeth, restore the contours of the gingival margin, correct the dentition, and recreate the individual characteristics of the teeth that meet the requirements of modern aesthetic dentistry.
Rice. 20. Prepared bed for the splint. Rice. 21. Total acid etching. Rice. 22. Strengthening Ribbond on premolars. Rice. 23. The tape goes around the neck of the canine. Rice. 24. View of the splint from the vestibular side. Rice. 25. Applying composite to tape. Rice. 26. Finished restoration.
Literature
- Andreeva V. A., Chukhrai I. G. Modern technologies for splinting and microprosthetics of teeth. Part Fiberglass Glass Chords. Adhesive splinting of teeth // Modern dentistry. - 3/2007. - pp. 23-27.
- Lutskaya I.K. Restorative dentistry: equipment, tools, auxiliary materials. - Rostov-on-Don: Phoenix, 2008. - 202 p.
- Lutskaya I.K., Novak N.V. Master class on aesthetic dentistry. — M.: Med. lit., 2009. - 144 p.
- Dunn JR, Hutson B, Levato CM Photographic Imaging for Esthetic Restorative Dentistry. Compendium, 1999. - Vol. - No. 8. - P. 766-778.
- John F. McCabe, Angus WG Applied Dental Materials. Blackwell, Munksgaard, 2008. - 303 p.
- Pensler AV Shade Selection: Problems and Solutions/ Compendium. - Vol. 19, No. 4. - P. 387-398.
- Zhang X. Effect of wire ligature splint'reinforced with preparing groove and employing composite materials on the teeth with severe periodontitis //Hua Xi Kou Qiang Yi XueZa Zhi. - 1997. - May. ; 15 (2): 138–40.
Indications for the use of Glasspan
Splinting with glasspan tape is prescribed in various clinical situations, which makes this material almost irreplaceable in orthodontic and prosthetic dentistry. Most often, this tape is used to solve the following situations:
- emergency restoration of dentition and chewing function in case of loss of anterior incisors and canines (for example, as a result of injury),
- temporary strengthening of bridges if they have become loose,
- replantation, that is, the return of a tooth removed (due to injury or complex surgical treatment) to its own alveolus,
- tooth restoration using an intracanal pin,
- fan-shaped divergence of the upper front teeth,
- achieving retention (holding teeth in a new position) after orthodontic treatment.
The tape is fixed on the inside of the teeth, unites them into a group, thereby helping to strengthen their position. In addition, due to the strength of the material, composite materials can be strung onto the tape, which allows this option to be used for prosthetics. But, of course, temporary, because such an adhesive prosthesis will not withstand heavy loads.
Reviews
Every year, new materials and techniques appear in dental centers that allow you to quickly restore or restore the required number of teeth. Of all the latest developments, the GlassSpan system has become the most popular.
You can share your experience in dental treatment/restoration using this technology and express your opinion regarding its quality and effectiveness by leaving a comment on this article.
If you find an error, please select a piece of text and press Ctrl+Enter.
Tags splinting
Did you like the article? stay tuned
Previous article
ProRoot MTA - reliable protection and restoration of root canals without the risk of rejection
Next article
Rules for working with the unique composite material Herculite
Advantages of this splinting system
- "Glasspan" retains its fastening properties even at high temperatures and high humidity, that is, you can drink hot drinks without obvious restrictions,
- has a long service life,
- does not cause shrinkage, thinning, abrasion and other deformations,
- There are no fringes, tears or other damage to the integrity of the product at the cutting site, so dentists note that this system is very simple and easy to work with,
- has high aesthetic characteristics (the tape is invisible in the mouth because it has a light shade),
- does not cause discomfort when wearing,
- easy to use (that is, the doctor does not need to use additional tools when applying a splint).
Features and Benefits
The thin transparent material is biologically compatible with oral tissues. Hydrophobicity does not allow it to be destroyed by moisture, and its strength does not crumble. The fragments are held securely.
Not dangerous. It remains durable in the mouth; in addition, it is not subject to wear, does not wear off and does not shrink during sudden changes in temperature. When cutting and modeling, the fibers do not unravel or diverge.
In comparison with similar technologies, there are undoubted advantages:
- Constancy of physical parameters.
- Duration of service.
- Not observing shrinkage, stretching and other deformations.
- Maintaining an aesthetic appearance - the tape or cord is absolutely invisible.
- The flexible substance does not allow sensation in the mouth.
- Simple application does not require gloves or scissors, making the process simpler.
- Efficiency.
- High micromechanical retention.
- Elasticity.
- Light polishing.
Areas of application
If necessary:
- Periodontal strengthening – splinting.
- Urgent treatment.
- Correction of diseased and reimplanted teeth.
- Temporary strengthening of prostheses.
- Preservation after orthodontics.
- Creating a long-term bridge.
- Quick tooth replacement.
- Adhesive splinting.
- Microscopic prosthetics.
- Restoration of a unit with an intracanal pin.
In what cases is it used
The ceramic system is endowed with a lot of useful qualities.
- Splinting
The type when GlassSpan is most often used. In order to stabilize the teeth located in front, a groove is formed from the inside of any jaw and then a tape is placed. It will cover loose and strong teeth. With such a single block, the pressure during chewing is shifted to the elements in front. The smile looks great! The existing void is filled with a composite, which is subsequently illuminated by a lamp.
- Microprosthetics
With this method, damaged dental units are restored and function as before without the need to grind down adjacent ones. Having fixed it, the doctor forms a crown with a composite, with a shade as close as possible to the “native” teeth. With this technique, manipulations are performed only in the frontal region of the jaws.
Analogs and price
| Click to sign up for a FREE consultation |
Absolutely similar materials are tapes:
- Ribbon is made from plasma-treated polyethylene fiber. Least plastic and almost non-shrinkable.
- Bioloren InFibra is made from a bundle of individual polyethylene fibers. Causes difficulties at work.
- Fiber-Splint - woven for restoration and splinting.
- Fiber-Splint ML - splinting with multiple layers.
The price of GlassSpan is available for widespread implementation in private and public dental clinics.
Disadvantages of this splinting system
- applying a fiberglass splint requires high manual skills from the doctor, otherwise the splint will cause discomfort to the patient, since its edges or fibers can stick out from the filling material and thereby injure tissues and make it difficult to clean teeth,
- since the tape partially covers the dental spaces, oral care becomes more difficult and the risk of caries in these hard-to-reach places increases,
- splinting with Glasspan for periodontitis and periodontal disease can act as a temporary measure (or for a mild form of the disease), since the tape leaves the teeth some mobility and lasts less (up to three years) than, for example, an aramid thread (up to six years) for cable-stayed splinting.
In general, the patient needs to understand that no matter how the doctor fixes the moving teeth, the therapeutic effect will still be temporary. In particular, if the gums are not treated, the teeth will still become loose and will fall out in the future along with the installed band.
How we carry out the procedure itself.
It is necessary to treat your teeth in advance and have them professionally cleaned to remove tartar and plaque. Immediately before splinting, the doctor administers local anesthesia, completely eliminating pain.
The doctor forms a groove on the surface of the loose teeth and neighboring healthy ones, into which he places GlassSpan, and then fills it on top, closing the fastening tourniquet. The dentition becomes one whole and no longer bothers you with its unreliability.
In our Dentalux clinic, installation of the flexible GlasSpan system costs from 1,200 rubles. Chew your food lightly and smile widely!
Tactics for using fiberglass tape
First method: splinting
The most common method designed to combine the front and side teeth into a single block. It is used for periodontitis, periodontal disease and after wearing braces/aligners to secure the position of teeth. The tape is installed on the inside of the teeth (less often, on the front, but in this case it will be very noticeable, so it’s better not to use this option).
Second method: microprosthetics
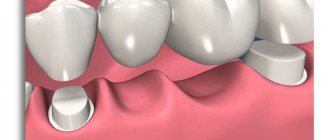
Using this tape, an adhesive bridge is created: the use of glasspan tape as a reinforcing material for prosthetics of one unit (most often frontal). The essence of the method is that a fiberglass tape is glued to the teeth adjacent to the missing teeth using a composite material, which is “stretched” over the toothless area. After this, the tape is strengthened with a special polymerizing lamp. Next, an artificial tooth is glued onto this frame, i.e. crown. This method is suitable for patients who suffer from allergies to various metals, or when it is necessary to quickly restore a lost tooth. It, of course, will not withstand a heavy load, but if we are talking about urgency, then this option is quite possible.
How is splinting done with tape?
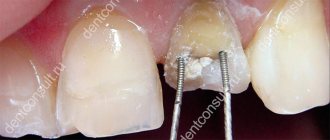
To strengthen the incisors, a small groove is made on their inner side, where a glasspan cord is placed, after which the entire structure is covered with composite material. Also, the tape can be fixed simply from above, without recesses. In this case, the ends of the Glasspan must be attached to stable units so that a strong reinforcement structure can be created. Installation of the tire can be carried out without drilling a groove, simply securing the tongue of the tape with a light-curing composite.
On the lateral teeth and molars, splints are applied along the chewing surface of the crowns using the same technology.
Important! Since the ceramic material of glasspan tapes and cords is heat-resistant, they are not afraid of final grinding and polishing. Unlike tapes based on plastic compounds, which can melt and become deformed, ceramics remain stable.
Benefits of installing a tire
Splinting, firmly fixing the teeth, returns the patient the ability to chew solid food without fear of permanently moving the tooth root and losing the tooth.
In addition to saving chewing function
, splinting can
restore a beautiful, open smile
. The main thing is to have time to remove the problem in time, because due to daily chewing load the condition can quickly worsen.
The technique has a lot of advantages
. Firstly, it is its simplicity and the ability to perform it in one procedure. Splinting does not harm the tooth structure and does not interfere with daily hygiene. The tires used are strong and durable, and can be quickly removed if necessary.
Specifications
“Glasspan” has gained popularity among dentists primarily because of its characteristics, which significantly improve the quality of work and facilitate the installation process itself. Many doctors choose this material for the following reasons:
- These products are smoother, which means they are less susceptible to contamination. They do not have a porous structure, so plaque does not accumulate or settle,
- Many splinting materials must first be impregnated or treated with various solutions to increase their adhesion. “Glasspan” is immediately ready for use, so the doctor avoids unnecessary contact with the impregnating substance, which stains the gloves and thereby makes it difficult to work in the oral cavity,
- the flexibility of glasspan tapes and cords allows them to be bent at any angle, which means that teeth can be splinted in almost any clinical situation, which can sometimes be quite unique,
- the unique structure of the product eliminates the formation of fringe and shedding during incision, which means it is safe for the patient,
- the cord has the structure of a hollow rope, that is, it can be filled with any composite material, which makes it universal in terms of use: “Glasspan” is used for bridging internal tooth cavities, reinforcing prostheses, including bridges,
- Since glasspan products have a woven structure, they can be unfibered to perform various manipulations, including those of a restoration nature.
Working and technical qualities of the material
Most dentists who use Glas Span in their work stated that this material, compared to other fiber reinforcement systems, is easier to use because does not get dirty.
Some of the other reinforcement materials are treated or pre-impregnated with resin and cannot be touched directly by fingers or gloves without contamination. This makes it difficult to handle or attempt to place the splint in the mouth.
GlassSpan tape is the thinnest and most flexible material for splinting. Other reinforcing materials are much thicker.
The tape can be cut with any seam or cord scissors. Materials from other manufacturers require special scissors, which must be purchased at an additional cost.
Unique round braided rope configuration: This is the only fiber that is twisted into a hollow rope (in addition to tape), it is more suitable for intracoronal splinting, as well as for bridge reinforcement, post and core extensions. The ropes can be inflated with flowable composite or layered material.
Patented Surface Treatment: Glas Span is the only etched and silanized ceramic fiber that provides ultimate mechanical and chemical adhesion to composite resin. Some of the other fibers are pre-coated with resin, but without the proprietary surface treatment that provides maximum bond strength.
The tapes are made of ceramic fiber, not plastic - ceramic fibers are more dimensionally stable than plastic, do not absorb moisture, and do not require restoration. The transparency of fiberglass is more aesthetically pleasing, and the ceramic material does not wear out. If it is exposed during polishing, it can be easily closed without endangering the entire restoration. This does not apply to plastic reinforcement materials.
If the plastic fibers are accidentally exposed to heat during polishing and adjustment of the restoration, they will begin to fuse. The material becomes contaminated, which means the entire tire will have to be remade. At the same time, GlasSpan can be easily polished; the material does not react to temperature changes.
