Silicone impression material and mechanical manual mixing gun
An impression tray with perforations is coated with a thin layer of special adhesive. To carry out the manipulation you need: 1) a set of tools (mirror, tweezers, angled probe, smoothers of different sizes, a special shaped knife); 2) means for retraction (knitted rings or cotton threads).
Double impression technique.
As a rule, this procedure is carried out in two stages.
In the first of them, a basic dense paste (Ortosil, Zetaplus, ZM Express, Bisico, Speedex) mixed with a catalyst is applied to a release tray lubricated with adhesive and an impression is taken. At the same time, in order to create space for the corrective paste, the procedure is carried out before preparing the teeth, without removing the provisional (temporary) crowns or by first covering the impression material with a strip of thin polyethylene film. In this case, there will be some space for the clarifying (correcting) layer, which will facilitate obtaining a more accurate impression without excessive pressure on its individual areas.
Filling the tray with the main impression material (explanations in the text)
Preliminary impression of the upper jaw
After preparation, a pharmacomechanical expansion of the gingival groove (pocket) of the supporting teeth is carried out, a linen or cotton thread or a knitted ring is introduced there, pre-impregnated or ex tempore with solutions of a vasoconstrictor and an astringent.
Insertion of a retraction thread into the gingival grooves of prepared teeth: a - beginning; b- end of the procedure
Hollow cotton cylinders are used to dry (including stop bleeding from the gingival sulcus) the hard tissues of the tooth and fix the retraction thread when taking double impressions After inserting the retraction cord into the gingival sulcus, a cotton cylinder is placed into the prepared tooth. The dentition is then fused to provide a clean, dry, and open gingival sulcus. The cotton cylinder and retraction thread are removed immediately before taking the corrective impression. The first layer of the impression personalizes the standard tray with which it was produced. A layer of paste is cut off on it at the top of the roof of the palate and along the edges of the impression for its free reintroduction into the oral cavity. In addition, the interdental septa are removed to prevent compression of the interdental papillae. Finally, the outlet grooves are engraved from the tooth impressions to the top of the palatine vault, radially, to prevent elastic deformation of the impression.
Preparation of the first layer of double impression for applying the corrective mass
Then the first layer of the print is dried and filled with a low-viscosity clarifying paste (Xantopren, Oranwash, Thixoflex, Bisico, etc.).
Application of a low-viscosity corrective impression mass to obtain a clarifying impression
The threads are removed from the pockets, and the pockets themselves are dried with a stream of warm air. They can be filled with corrective paste using a special syringe with a curved cannula.
Filling gum pockets with corrective paste using a syringe with a curved cannula
You can take an impression without using a syringe by filling the impression with clarifying paste and reintroducing it into the oral cavity. After the corrective paste has hardened, the impression is removed from the patient’s mouth.
Double impression after removal from the patient's mouth
Obtaining the final two-layer print.
The corrective mass is mixed with the catalyst according to the manufacturer's recommendations on glass or on special paper using a spatula, or using an automatic mixing device. When mixing, it is important to ensure that the mixing is complete and, where possible, to minimize the formation of air pockets.
In this sense, preference should be given to devices for automatically mixing the mass. After mixing, the corrective mass is added to the prepared preliminary impression. It should be located in the area of the entire dentition. There is no need to cover the entire surface of the impression with it, however, it should be noted that applying the corrective mass only to the area of prepared teeth, which is often practiced by doctors in order to save impression material, is a clinical mistake.
Before inserting the tray into the mouth, retraction cords or other means of gum retraction are removed. The prosthetic bed is dried.
After introducing the impression into the oral cavity, it is installed on the dentition and moves forward, creating dynamic pressure. The degree of finger pressure on the impression depends on the viscosity of the corrective mass. Unfortunately, this is a quantity that is difficult to describe. We can only note that when using very fluid corrective materials, excessive compression should not be created. If all recommendations are followed, a two-layer print obtained using a two-stage technique is distinguished by a high quality of display of surface details.
One-step technique for obtaining two-layer impressions with elastomers. The one-step technique for producing two-layer elastomer prints is also called the “double stirring” technique or sandwich technique. The advantage of the technique is the absence of deformation of the first layer of the impression by the second, which is due to the simultaneous introduction of both layers of mass in a plastic state onto the prosthetic bed. The main disadvantage is the lower quality of displaying surface details compared to the two-stage technique, which is associated with the low dynamic pressure on the correction mass when using the one-step technique.
In addition, it should be noted that when applying this technique, preference should be given to materials whose base layer has increased final elasticity. The procedure for obtaining an impression using the double mixing method includes the standard steps of selecting a tray, applying adhesive to it, and drying the prosthetic bed after removing the gum retraction agents. Further, the peculiarity of taking an impression is the simultaneous application of the first and second impression material on the tray and the introduction of a corrective layer into the periodontal sulcus apical to the edge of the ledge.
For this purpose, special cannulas with a tail part are attached to the cartridges for mixing the material.
The reverse order of applying the impression material is unacceptable, since under the influence of temperature the mass in the oral cavity will begin to structure earlier than the mass in the impression tray.
After this, the impression tray is inserted into the oral cavity, centered and advanced according to generally accepted rules. When taking an impression using the sandwich technique, excessive pressure on the tray is unacceptable. After structuring the mass, the impression is removed from the oral cavity and its quality is assessed.
Laboratory manufacturing steps:
1. Making plaster models (working - combined). Plastering the models into an occluder or articulator, applying compensation varnish to the die, obtaining a wax cap.
2. Modeling of the wax composition (the anatomical shape of the tooth crown in full).
3. Replacing wax with metal (casting), abrasive processing of the metal structure, fitting to the model, grinding, polishing.
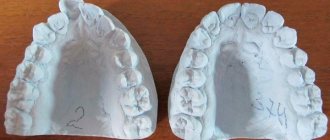
The main material for models in all systems is gypsum of 3rd and 4th hardness classes. In addition, such systems use polymer bases without pins (model-tray, New Logic systems), polymer bases and pins (Kiefer-model, Zeitzer).
Thus, there are three main ways to create dismountable plaster models of jaws:
· without pins, using a polymer model base;
· using pins and a polymer base of the model;
· using pins and a plaster model base.
A number of requirements are imposed on the combined collapsible model: accuracy and minimal changes in volume, strength and smooth surface of the tooth stump and areas of the model in contact with the cast structure; easy removal and installation of the tooth stump in the base part of the model, reliable fixation of the tooth stump in the model; lack of horizontal displacement and mobility of the stump in the model; good adhesion of compensation varnishes and the model surface.
To compensate for the shrinkage of alloys when casting a metal prosthesis, to smoothly remove wax compositions and prevent their deformation, a compensation varnish is applied to the plaster dies. Stumflac (Germany), Kompepak from Tsepit (Russia), etc. are used. To compensate for the shrinkage of KHS alloys, it is necessary to apply 2–3 layers of varnish. The first layer is applied over the entire surface of the plaster stamp, covering the cervical area. After this, you need to let the varnish dry for 3 – 4 minutes at room temperature. Next, subsequent layers of varnish are applied, also at drying intervals, but they should not reach the cervical area of 1 mm. Coating the plaster stamp must be carried out with smooth movements from the cervical area to the chewing surface. Drying of the applied layers is carried out only in a horizontal position of the gypsum stamp. All of the above eliminates the flow of varnish into the cervical area and the likelihood of getting a wide crown in the future.
When modeling a solid crown, you can use one of the proposed methods:
— Method of layer-by-layer application and removal of wax,
— Method of immersion in molten wax,
— Method of modeling the base of the crown by crimping with clasp wax.
The thickness of the modeled crown should not exceed 0.5 mm.
Method of layer-by-layer application and removal of wax
The essence of the method is to apply small portions of molten modeling wax using modeling tools (spatulas, scalpels, trowels, etc.) in a volume exceeding the area to be restored (crown, gap in a bridge). Subsequently, the modeling material is scraped off, cut off, cleaned, cut out using a modeling tool, achieving an anatomical shape to the tooth or prosthetic element. During the work process, you can additionally repeat the application or removal of the wax composition in the required quantity on a certain area of the modeled surface.
Melted wax dipping method:
It is used mainly when modeling single plastic and cast crowns, at the initial stages of modeling frames of cast and metal-ceramic prostheses. The emergence of new waxes with sufficient strength, elasticity, low shrinkage coefficient, as well as devices for melting wax (wax melters) makes it possible to simplify the modeling of solid cast permanent structures.
When using this modeling method, dipping wax is placed in a wax melter to heat it up and maintain a constant temperature. The devices have several heating modes, which allows you to adjust the thickness of the wax compositions: the higher the temperature of the wax, the thinner the wax reproduction is obtained. By dipping a plaster stamp into wax at a certain specified temperature, a wax reproduction of a crown or any structural part of a certain thickness is obtained. Subsequently, correction of the anatomical shape and thickness is carried out using the method of layer-by-layer application and removal of wax.
Method of modeling the crown base by crimping with clasp wax.
Using this method, wax reproductions of cast single crowns are obtained. The use of wax compositions in the form of plates (base and clasp waxes, grooved and final modeling waxes) facilitates the creation of wax structures.
The wax plates, heated on one side over the flame of a burner or hotplate, are placed on plaster models or stamps, and without unnecessary effort they are pressed into the shape of the jaw or stump, being careful not to press the wax or create folds. Excess wax is removed within the required limits using a heated instrument. Correction of thickness and shape is carried out using repeated compression or layering.
For all methods of casting in a mold, in addition to the reproduction of a metal frame, a gating system is provided, which is channels through which liquid metal is supplied to the casting. The gating system is created by applying polymer or wax sprue-shaped pins to the wax reproduction (model) of the prosthesis frame, which, after removing the wax from the flask, become casting channels. In addition, the gating system allows the formation of the porous structure to be shifted away from the casting objects.
Gating system application. Conversion of wax composition into metal
There are certain conditions for constructing a gating system:
—When casting, all areas of the prosthesis frame must be in equal conditions. This is achieved by using ready-made wax rod profiles and wax wire with a diameter of 2.5; 3.0; 3.5; 4.0; 4.5 mm, or they are modeled directly in the dental laboratory. Moreover, for small parts one sprue with a diameter of 1.5 - 2.5 mm is used, for large (thick or extended) 3 - 6 sprues with a diameter from 2.5 to 4.5 mm. Moreover, if there are several metal sections in the prosthesis frame, then each such section must have its own sprues. All gates are united by a common large-diameter manifold, which ends in a funnel-shaped expansion;
— the dimensions of the gating system must be suitable for the cast prosthesis frame. The length of the sprue should be such that the highest point on the wax model is 6 mm from the edge of the flask. If the wax model of the denture frame is too close to the edge of the flask, the molten metal alloy can penetrate the molding compound during casting; if it is too far away, the gases cannot escape quickly enough to ensure that the alloy fills the mold accurately. On the other hand, a sprue that is too short forces the wax frame of the prosthesis to be placed closer to the upper edge of the flask, which leads to premature cooling of the metal, leading to an increase in the number of casting defects;
- the molten alloy must flow from thick-walled areas to thinner ones. Therefore, on the sprue, near the massive areas of the wax reproduction (model) of the prosthesis frame, a thickening (coupling) is created, an additional depot of liquid metal to eliminate shrinkage cavities, looseness, and porosity in the metal;
- you should take into account not only the number, length and diameter of the gates, but also their direction and location, because they should not abruptly change the direction of the metal flow, and the centrifugal force would contribute to the compaction of the metal.
Processing of cast structures. Grinding and polishing of the prosthesis
Dental casting must be highly accurate and fully consistent with the model, which is achieved by using molding materials. The expansion and contraction of the casting is compensated by the expansion and contraction of the molding material. Depending on the binder, molding materials are divided into gypsum, phosphate, and silicate. Preparation of the refractory mass in strict accordance with the manufacturer’s recommendations.
After the casting process, the mold is cooled in air, the parts are placed in heated muffle furnaces and cooled along with it. Then carefully use a plaster knife to remove or squeeze out the molding mass from the small flasks and free the cast parts from it. When casting stainless steel parts, sometimes there is dense baking of the facing layer to the metal. In such cases, an acid or alkali solution is used to clean the parts, or the part is cleaned in a special bath using ultrasound or a sandblaster.
Processing begins by removing the sprues. For steel and chromium-cobalt parts, this is done on the motor with a carborundum disk. Due to the high hardness of these alloys, further processing is carried out first with a sandblasting machine, and then with the help of carborundum stones and metal burs. By working with stones and burs, a smooth surface is achieved. If underfilling and pores are detected in the casting, the processing is stopped and modeling of the wax part begins again.
The cast structure that meets all the requirements is carefully fitted on the working model until it fits snugly. The guideline is to accurately position the edge of the frame on the ledge in the cervical part of the model tooth stump. The quality of the metal structure is checked in the clinic. To do this, the working model along with the metal structure is handed over to the doctor.
There is a one-step method for obtaining a double impression (sandwich method).
At the same time, having filled the spoon with the main paste, the doctor makes indentations in it, in the area of the projection of the supporting teeth. A corrective infusion is injected there. It is applied from a syringe to the prepared teeth. After this, a spoon with two pastes is inserted into the oral cavity to take an impression. With a one-step method of obtaining a double impression, it is preferable to use silicone materials with a polymerization type of vulcanization, which ensures a more accurate dosage of their components (group A-silicones, for example President, Contrast, ZM Express Bisico). Modern silicone materials, a day after receiving an impression, have small volumetric changes - 0.14-0.60%, residual deformation - 0.2-0.5%, relative compression - 1.3-2.5%, reproduction of parts - 22 µm, fluidity - 0-0.1%. The shrinkage of silicone impression material is small, but the model must be cast within the first hours after taking the impression. To disinfect silicone impressions, solutions of various substances are used: hydrogen peroxide, sodium hypochlorite, glutaraldehyde, deoxane. A double impression is considered suitable if the relief of the prosthetic bed is accurately imprinted (including the contours of the gingival margin, interdental spaces, the stumps of prepared teeth, the area of the ledge) and there are no pores or smears of the relief with mucus on its surface. The basis for re-taking an impression is the following defects: • smearing of the relief due to the quality of the material (bracing) or the ingress of oral fluid or blood; • discrepancy between the impression and the future dimensions of the prosthetic bed; • lack of clear design of the edges of the print, presence of pores.
Source: Orthopedic treatment using metal-ceramic dentures. Ed. V.N. Trezubova 2007
Related materials:
- Gum retraction methods
- Preparing teeth for metal-ceramic crowns
- Preparing a patient for prosthetics with metal-ceramic prostheses
- Indications and contraindications for prosthetics with metal-ceramic prostheses
Why is it important to have a professional create your impression and model?
A well-made prosthesis is the key to your health. This is why it is important to make the correct impression and model. The success of prosthetics depends on the level of professionalism of the specialist. What are the responsibilities of a dental technician? He manufactures and repairs prosthetics, orthodontic and maxillofacial devices, and implants. Among this, we highlight other works performed by a specialist:
- makes a tooth model based on a cast made by an orthodontist;
- selects the material and decides what the design of the prosthesis will be;
- carries out modeling;
- makes a tooth model;
- creates devices of removable and non-removable types;
- manufactures maxillofacial and orthodontic appliances;
- does finishing and repairs of dentures.
As you can see, the list of works includes a lot. And experienced specialists cope with this easily and simply, applying their knowledge, skills and abilities in practice.
