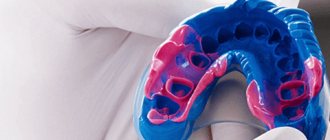
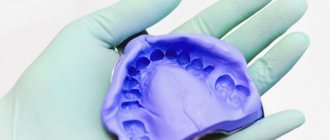
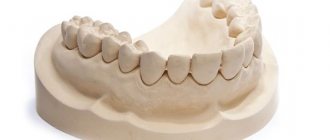
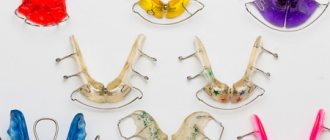
Impression taking technique
Custom impression trays are created by a podiatrist in the dental office. The impressions obtained after the functional test are clearly aligned with the prosthetic fields. The product is pre-fitted.
Correction of the frenulum of the tongue, cheeks and lower lip is performed. Recesses are formed along the edges of the product. Depending on the location and size, the tubercles on the mucous membrane are closed completely or partially.
It is necessary to block the false mylohyoid lines and preserve the function of saliva drainage by Wharton's ducts.
During the manufacturing process of prosthetic products for edentulous jaws, potential changes in the structure of the gums are taken into account. To achieve reliable stabilization and fixation of orthopedic structures, it is necessary to obtain a clear image of the relief of the mucous membrane of the prosthetic bed. When making a dental tray for patients with edentia, the functional state of the soft tissues of the prosthetic field is taken into account.
When creating a prosthesis for toothless jaws, the tray is used as the base layer of the impression. Using corrective material of low viscosity, the doctor reliably recreates the relief of the mucous membrane.
Herbst tests are ineffective in cases of severe atrophy of the alveolar process. This is due to the fact that the methodology is standardized.
The material used to mark the boundaries of the print is plaster or silicone. Some dentists prefer silicone due to its plasticity.
Classification
Differentiation adopted in dentistry involves dividing impressions into two categories:
- Working, or precision – precise impressions used to create functioning replacement structures installed on a permanent or removable basis;
- Auxiliary - as the name implies, this group combines all additional impressions that eliminate information gaps and make it possible to clarify the specifics of the occlusal relief to improve the quality of wearing the prosthesis.
Another category is occlusal recorders, whose task is to functionally complement and combine these types of impressions. If there are a sufficient number of surviving units, their use is not always advisable, but the desire to achieve optimal occlusion and shorten the adaptation period are good reasons for using recorders.
In terms of the number of jaws represented by the impression, there are one- and two-jaw options, with the second option being used much less frequently in dentistry. The effectiveness of using a separate impression for each row of teeth is determined by the quality of the resulting pattern.
Based on the technique of designing the marginal areas, anatomical and functional impressions are distinguished, however, it is quite difficult to establish a clear line of differentiation between them. Functional variation involves the use of clarifying movements of active and passive properties, allowing one to obtain additional information necessary for the formation of a prosthetic system. In turn, anatomical impressions are used for permanent replacement, when technical interest is primarily in the characteristics of the tissue structure of the prosthetic bed, while the marginal design loses its original priority.
Impression from the lower jaw
There are six stages of creating a functional impression:
- Setting the workpiece to LF. The visitor closes his mouth and swallows the accumulated secretion. The muscles that compress the pharynx contract. When the spoon is dropped, distal shortening occurs.
- The person presses his tongue on his cheeks one by one. After dropping, the workpiece is shortened along internal oblique lines.
- The patient reaches his tongue to the corners of his mouth. The product is cut in zones 3, 4 and from the mouth.
- A man sticks out his tongue and reaches for the tip of his nose. Then he runs his tongue along his upper lip. The chin muscles become tense. The displaced tray is shortened near the front teeth on the intraoral side.
- The patient strains the pterygomaxillary muscles with the mouth wide open. Distal shortening.
- The cheeks are retracted, and as the position of the spoon changes, shortening is performed near 6, 7 and 8 units. As a result of tension in the mental muscles, the device is reset and created in the corresponding area.
Author's protocol for obtaining preliminary impressions from edentulous jaws
A preliminary impression (PO) is a negative image of the tissues of the prosthetic bed with clinically significant anatomical landmarks, obtained using a standard tray and a set of functional tests (PT), providing maximum information to the dental technician for the manufacture of an individual tray (IT), requiring minimal correction to obtain an effective functional suction impression [1].
Obtaining primary information about the prosthetic bed for a dental technician is carried out only on the basis of preliminary impressions from edentulous jaws obtained by an orthopedic doctor. Despite this, when analyzing numerous literature on the topic of “complete removable prosthetics”, one gets the opinion that most authors do not pay due attention to the significant role of the stage of obtaining software for the production of IL. A secondary attitude towards this stage can initially lead, at best, to the complication of the already labor-intensive and time-consuming fitting of the IL, and at worst, to a discrepancy between the boundaries of a complete removable denture (FRP). And if we take into account the fact that shortcomings and errors in obtaining software can only in rare cases be corrected through final functional impressions (FO), we can draw an unambiguous conclusion - obtaining software is a mandatory and important stage in the rehabilitation of patients with complete absence of teeth (PZ) with removable teeth prostheses, requiring an appropriate implementation protocol and criteria for assessing its quality. When obtaining software, it is necessary to strive to obtain the most approximate correspondence between the boundaries of the impression and the future PSP, minus the thickness of the edging material (on average 2-4 mm depending on the material used), as well as creating minimal pressure on the underlying mucous membrane (SM) in order to exclude its deformation.
Before obtaining software for the production of IL, you need to carefully weigh the data of the clinical examination of the patient, study the clinical anatomy of edentulous jaws, the nature and degree of atrophy of the bone bed, have an idea of the peripheral boundaries of the future PSP, the type of SM, its compliance and endurance to pressure and, as a consequence, , to predict the degree of compression influence of the impression mass (OM) during the period of obtaining PO.
Software requirements:
- The software is removed from healthy tissues of the prosthetic bed. If there are signs of chronic or acute inflammation of the mucous membrane, a week before the impressions, measures are taken to eliminate them (limiting the time of using old removable dentures, avoiding adhesives that cause swelling of the mucosa, clinical relining or using a fabric conditioner - Ufi Gel).
- PO is obtained by an OM that reflects the relief of the prosthetic bed, moderately presses the surrounding soft tissues and does not have excessive fluidity. Alginate masses are optimally suited for these purposes.
- The software overlaps or is located at the level of those anatomical formations that are in contact with the basis of the future PSP. Failure to comply with this requirement will certainly lead to a significant discrepancy between the boundaries of the IL and future prostheses, and, consequently, to a decrease in their functional value.
- The software records not only the depth of the anatomical grooves, but also their width. In other words, the boundaries of the software should be three-dimensional, just like the edges of future dentures.
- Using functional tests to design the outer edge of the PO, the borders of the PO are brought as close as possible to the neutral zone. As a result of correct implementation of this stage, the ILs will require minimal correction, which will further facilitate their fitting and save time for the doctor and the patient.
- The outline of the future IL is marked on the software with an indelible marker, always in the presence of the patient (to be able to clarify the boundaries). To facilitate this stage, you can display anatomical landmarks with a chemical pencil in the oral cavity, and when the impression is applied again, they will be imprinted on its surface.
- Use the stage of fitting the software in the oral cavity with the creation of clear boundaries and a thickness of the edge of the impression of at least 3 mm before making the IL, which will significantly reduce its fitting in the future and increase functionality (patented proprietary technique).
The first and very important point when obtaining preliminary impressions is the stage of a clear visual representation of the boundaries of a complete removable denture in a particular patient. It is difficult to guarantee success in prosthetics for patients with POP, relying on the recommendations most often mentioned in the educational literature on the location of the boundaries of the PSP (“the boundaries of the PSP should run along line “A”, the transitional fold, overlapping the tubercles of the upper jaw (MC) and mucous tubercles on the lower jaw (LF), while bypassing frenulums and cords of soft tissue..."). For effective prosthetics, specific anatomical landmarks are required, allowing not only to accurately determine the preliminary boundaries of the IL with the subsequent functional design of its edges, but also to assess the boundaries of the finished PSP.
Functionally significant anatomical formations
The main landmarks in determining the boundaries of the PSP, which should be displayed on the software, include the following anatomical formations on the HF:
- The frenulum of the upper lip in all cases does not overlap the PSP. Therefore, the PO is released to its entire length and thickness, especially at its base, without exceeding the size of the frenulum itself.
- The labial vestibule (potential labial vestibule space) is identified by gently pulling the upper lip down and slightly forward using the index finger and thumb. In this case, the resulting space must be completely filled with the volumetric edge of the PSP [3].
- Buccal alveolar cords are located at the level of premolars or canines. Their movement should not be limited to the edge of the PSP, therefore they are displayed on the print in the form of several grooves directed from front to back and from bottom to top.
- The buccal vestibules with the base of the zygomatic process of the HF are the bone basis of the transitional fold (the neutral zone coincides with the transitional fold). An impression is easily formed in this area using a passive test - pulling the cheek to the side and down with the doctor’s index and thumb.
- The vestibular spaces in the area of the maxillary tuberosities (Einsenring's ampullary area) are often narrow and have undercuts. It is actively formed by bilateral lateral displacements of the LF [2].
- The alveolar process is completely covered by the impression, up to the transitional fold.
- The maxillary cusps do not atrophy when teeth are lost and should be displayed in full in the software.
- The pterygomaxillary notches are determined using a dental mirror sliding along the distal slope of the HF tubercle. At the base of the tubercle, the end edge of the mirror falls into a depression, which is this formation and partially the posterior border of the PSP. The pterygomaxillary notches are marked with an indelible marker, since they are not visible during a routine examination of the oral cavity [3].
- Line “A” is easily determined when performing a nasal inflation test. The patient blows air through the nose with the nostrils pinched. In this case, the soft palate drops almost vertically and line “A” becomes clearly visible. More often, the PSP overlaps by 1-2 mm, but depending on the shape of the soft palate, the edge of the prosthesis can extend up to 5 mm in a flat shape or coincide with it in a steep shape. In this case, the following pattern is observed: the higher the palatine vault, the more anteriorly the “A” line is located and the sharper its bend.
- If, during a nasal inflation test, the patient’s CO is significantly pliable along the distal border, small folds may form on the tissues of the “A-zone,” as a result of which it will be impossible to determine a clear border of the “A” line. In such cases, the position of the A-line determined during the sound “A-test” should be taken as a basis (pronouncing the short sound “A”, but short sounds “AK” or “AH” are more effective).
- The blind fossae are a good guide to finding the posterior border of the PSP and are often overlapped by the PO. If there is significant compliance in the parathoracic region, these formations do not need to overlap the PSP, but in order to improve the marginal closing valve, it is necessary to engrave the working model along the posterior border [3].
- Sagittal suture with bony prominence. If the torus is pronounced, its boundaries must be accurately marked by the doctor on the software and isolated by the dental technician on the model before making the IL. These actions also apply to exostoses.
- The incisive papilla is often isolated on the working model. Otherwise, there may be compression of this formation and, as a consequence, a subjective deterioration in taste sensitivity.
- The transverse palatal folds must be isolated before the production of IL.
Anatomical landmarks on the LF:
- Due to decreased tone, the labial frenulum can be partially displaced by the edge of the PSP without any consequences.
- The labial vestibule (potential labial vestibule space) is identified by gently pulling the lower lip upward and forward using the index finger and thumb. In this case, the resulting potential space should be completely filled by the volumetric edge of the PSP [3].
- The buccal alveolar cords are not covered by the prosthesis and are displayed on the impression as several grooves directed from front to back and from top to bottom.
- Mandibular or buccal recesses (Fish cavities). Their boundaries in front are the buccal-alveolar cords, in the back - the retmolar spaces, laterally - the external oblique lines, medially - the external slopes of the alveolar process. These formations are completely covered by the base of the prosthesis [3].
- The alveolar process is completely covered by the impression, up to the transitional fold.
- Retromolar mandibular spaces with mucous tubercles, which, regardless of shape and compliance on the PO, must be displayed in full or distal to their two-thirds.
- The mandibular pterygoid lines rarely coincide with the boundaries of the PSP; they often overlap with them, extending their edges into muscleless triangles.
- Non-muscular triangles are more often overlapped by the PSP under unfavorable anatomical conditions. If a patient experiences a “sore throat” or pain when swallowing (angina-like pain), it is necessary to first thin the edge of the PSP in this area, and if there is no effect, shorten it [3].
- Internal oblique lines (mylohyoid lines) are determined, like the tone of the muscles of the floor of the mouth, only by palpation. Depending on the severity of muscle tone, the edge of the PSP overlaps these formations by 2-6 mm, not vertically downwards, but hollowly, taking into account the functional state of the muscles of the floor of the mouth [3].
- Language. With the correct design of the inner edge of the mandibular PSP, the tongue performs a stabilizing function (the lingual inclination of artificial teeth, which contributes to the shedding of the PSP, is unacceptable).
- The frenulum of the tongue never overlaps the PSP. The base of the prosthesis should not expand along the frenulum, otherwise the marginal closing valve will be broken.
- External oblique lines (oblique lines) are determined only by palpation, for visualization purposes they are immediately marked with an indelible marker and overlapped by the edge of the prosthesis by 2 mm in order to form a marginal closing valve with low-tonic buccal muscle [3].
- The geniohyoid eminence is always covered. Otherwise the closing valve will not be possible.
- The sublingual papillae, located on both sides of the frenulum of the tongue, should not overlap the PSP, otherwise they may become clogged and interfere with salivation. The patient feels dry mouth, the salivary gland swells, and an unpleasant feeling of tension occurs.
- The sublingual ridges that limit the lingual edge of the mandibular PSP are clear landmarks of its boundaries in this area [3].
Protocol of actions upon receipt of software
After a thorough examination, the patient is seated in a chair in an upright position. Using a dental caliper, included in the set with standard trays (SL) for edentulous jaws, the doctor measures the largest buccal convexity on the cusps of the upper jaw and between the internal oblique lines in the area of the first molars on the lower.
Selects the appropriate spoon according to the template included in the set and tries it on in the mouth. To do this, the patient is asked to open his mouth halfway and insert the spoon into the mouth horizontally using a handle. On the HF, first the posterior edge of the tray is placed in the pterygomaxillary recesses, and then installed in the anterior section, aligning the frenulum of the lip with the middle of the tray (in this case, the alveolar process should be in the center of the alveolar groove of the tray) [3]. The handle of the impression tray is the central reference point for placement, with the middle of the handle aligned with the midline of the face to ensure correct placement. The use of SL for particularly precise impressions has shown that only due to the optimal selection it is possible to save up to 30-40% of the impression material.
Creating positioners on a standard impression tray
In restless patients, during the hardening of the alginate impression (AO), undesirable displacements of the LM and sharp pressing of the moving OM, especially the labial or buccal frenulum, may occur, which will inevitably affect the quality of the OA.
To prevent this moment and create a uniform gap between the SL and the tissues of the prosthetic bed with a width of 3-5 mm, you can use the technique of creating silicone stops on the inner surface of the tray, which exclude its lateral displacements (guiding function) and, if the pressure is too long and high, prevent elastic changes in shape BY 1].
After repeated insertion of the SL with limiters, it is easy to assess the relationship of its edge to anatomical landmarks and, if they are short, carry out individual additional design (individualization of the edges of the SL). At the same time, we must adhere to the rule: “the edges of the PSP should not end on the hard tissues of the prosthetic bed due to the impossibility of obtaining an edge closing valve.”
Individualization in the area of the hard palate is required if there is a significant discrepancy in this area between the SL and the vault of the palate (more than 5 mm). The material located in the area of the hard palate of the SL not only individualizes, but also plays a guiding and restrictive role during its application during the preparation of a preliminary impression. With severe atrophy of the jaws, to obtain PO, it is often recommended to use silicone and polyvinylsiloxane masses with varying degrees of viscosity in order to push back the movable soft tissues, sublingual glands located close to the top of the alveolar part. In this case, due to the increased viscosity, thickening of the edges of the PO and deformation of the transition fold inevitably occur, which makes it difficult to determine the real boundaries of the PO. Considering the above-mentioned disadvantages and the high cost of these materials, alginate materials can be used as OM for software even under unfavorable conditions, but with mandatory individualization of the edges of the SL, regulated by a doctor. Due to the wide variety of atomic features of edentulous jaws, the high plasticity of alginate materials and the danger of shortening or expanding the boundaries of the PO SL along the periphery, it can be clinically shaped with base wax, thermoplastic or high-viscosity silicone masses. To do this, a softened and bent in half strip of base wax is placed along the edge of the SL, glued with a hot spatula and, inserting a spoon into the oral cavity, the wax is pressed along the slope of the alveolar processes. Areas of wax that have come into contact with actively mobile CO are cut off.
Most often on the HF, individualization of the SL is required in the area of the labial space, tubercles and the entire posterior border (to immerse the edge into the pterygomaxillary notches and overlap the “A” line). On the LF, the completed edges of the SL should overlap the mucous tubercles, internal and external oblique lines and, if necessary, enter the area of the muscle-free triangle.
In rare cases, you can use edging around the entire perimeter of the SL. By making an edging along the posterior border of the maxillary SL, we not only lengthen its borders, but also prevent the impression mass from flowing far into the soft palate. To do this, the wax strip is expanded towards the soft palate by 10-15 mm, while the velum is shifted back and up, which helps to display it in an elevated position on the soft palate. Individualization in the area of the hard palate is required if there is a significant discrepancy in this area between the SL and the vault of the palate (more than 5 mm). In this case, the material located in the area of the hard palate of the SL not only individualizes, but also plays a guiding and restrictive role when it is applied during the production of SL. Before introducing alginate into the SL, the doctor and the patient are recommended to practice placing the spoon in the desired position (especially on the LF) with imitation of functional tests and teach the patient to breathe correctly while receiving the SL. In this case, the severity of the gag reflex can be assessed.
Before receiving software, it is recommended to rinse your mouth thoroughly using weak antiseptic solutions or special liquids. They effectively remove mucus and food residues, have a moderately pronounced tanning effect of CO, and have disinfectant properties. You can free the surface of the CO from thick saliva and mucus using a sterile gauze wrapped around your index finger.
An analysis of works that substantiate and consider the effectiveness of using compression, unloading and differentiated methods for obtaining FO in various clinical conditions of the tissues of the prosthetic bed indicates that many authors underestimate the moment of compression and deformation of the FO when obtaining PO for the production of IL (Abdurakhmanov A. I., 1982).
Underestimation of the properties of OM for obtaining PO leads to the fact that the manufactured ILs record the deformation of the tissues of the prosthetic bed and the subsequent use of silicone OMs, as if providing differential compression of the OM, causes the same degree of compression and deformation of the tissues that was laid down when obtaining the PO.
To achieve these goals, alginate materials are most suitable, since silicone materials compress CO by 47%, and alginate masses by 27%. As a result of the use of alginates, it is possible to avoid fixation of the IL in the deformed state of the tissues of the prosthetic bed, to obtain an accurate display of the CO relief, achieving a fairly accurate relationship between the edge of the IL and the transitional fold.
Before receiving software, it is recommended to rinse your mouth thoroughly using weak antiseptic solutions or special liquids. They effectively eliminate mucus and food debris, have a moderately pronounced tanning effect of CO, and have disinfectant properties. Considering that alginate turns into a gel in about 40-50 seconds (A.P. Voronov, A.I. Abdurakhmanov, 1981, A.I. Doynikov, 1986), and functional tests are lengthy, novice doctors are recommended to use cold water to delay the setting of OM. To obtain the correct OM consistency, use only dosing containers for water and powder supplied by the manufacturer. The powder should not be heaped. Mixing the material by eye leads to an incorrect consistency of the mass.
For good adhesion of the OM to the surface of the SL, its edges must first be treated with adhesive sprays or a special adhesive glue. It is especially important to fulfill this condition when using edging materials to individualize the edges of the SL. Mixing of the alginate mass should be carried out intensively for the time specified by the manufacturer until a homogeneous paste-like mass is obtained. The finished material must be viscous enough so that it can be heaped onto the SL. The index finger moistened with the input smoothes the surface and forms a mass in the shape of the alveolar ridge. Creating a water film relieves the surface stress of the print.
Insertion of a standard impression tray into the oral cavity and functional formation of the edges of the oral cavity
Using a spatula or index finger, a small amount of alginate can be placed in the distal buccal vestibule and deepest area of the vault in the HF and in the sublingual area in the LF to fully display the anatomy and prevent the formation of air pockets. This should definitely be done when the doctor ignores the individualization of SL.
A spoon with an OM is inserted into the oral cavity in a circular motion, while the left corner of the mouth is retracted with the index finger (preferably a mirror), and the right one is moved back with the side of the SL. In this case, the following actions are performed: centering the tray with the OM, its immersion on the prosthetic bed, fixation and stabilization. Using oscillatory movements, the OM on the HF should first of all fill the labial and buccal grooves, after which the palatal area of the SL is pressed. The upper lip should be lifted with the index and middle fingers so that a sufficient amount of alginate enters the labial vestibule. Holding the spoon with one hand, the doctor can check the fullness of the buccal-labial grooves with the other hand. Translational pressure on the tray stops when alginate is visible along its entire posterior border. Thanks to pre-fabricated limiters, you can not be afraid of excessive immersion of the SL, even with significant finger pressure on it.
A set of functional tests for the maxillary palate:
- After complete positioning of the SL with OM on the prosthetic bed, the doctor applies finger pressure to it, perpendicular to its ridge in the projection of teeth 16 and 26 or in the area of the hard palate.
- Pulls the cheeks to the side and down with the index finger and thumb, thereby forming the buccal vestibule and eliminating pinching of the mucus.
- The upper lip is gently pulled forward using two fingers to release the frenulum of the upper lip.
- The patient pulls his cheeks inward, makes movements of the LF to the sides in order to design the foreign space, taking into account the dynamics of the coronoid processes.
- The patient places the lips in a tube and moves the corners of the mouth back, forming the area of the buccal alveolar cords.
- In addition, the patient is asked to open his mouth wide, recording the influence of the pterygoid folds on the distal edge of the PO.
- After carrying out the above tests, the SL is kept at rest until the alginate completely reaches a dense state. Pressure on the spoon or shaping its edges will cause stress in the layer where hardening began, which will cause distortion of the software. The use of silicone restraints eliminates this complication.
Important clinical points [3]:
- In the area of the frenulum of the upper lip, passive tests should be minimal.
- The lip should be pulled slightly forward and slightly down.
- Lateral movements of the lip are excluded as unphysiological, leading to an expansion of the space around the frenulum of the upper lip.
- In the buccal area, passive tests should be quite intense, with maximum pulling of the cheek to the side and down.
- Wide mouth opening and lateral movements of the lower jaw are required.
A set of functional tests for the mandibular soft tissue:
- To display the frenulum of the tongue in dynamics, we ask the patient to slightly lift and stick his tongue forward.
- Light lateral movements of the tongue to the sides to advance the impression material into the retromolar area and remove excess alginate from the sublingual area.
- Use your index finger and thumb to pull the cheeks to the side and up, bringing the boundaries of the impression closer to the outer oblique lines and avoiding pinching the rim of the cheeks.
- Pull the lower lip slightly upward and forward at an angle of 45 degrees using your fingers, thereby creating the potential space of the labial vestibule [3].
- The doctor exerts significant finger pressure on the spoon, perpendicular to its ridge in the projection of teeth 46 and 36, as a result of which the anterior bundles of the masticatory muscles themselves, intertwined with the cheek muscles, reflexively contract, while the distal-lateral edges of the PO are formed in the form of notches [3] . This test cannot be performed without silicone restraints [1].
- Holding the tongue with a finger, we ask the patient to perform several swallowing movements to functionally display the tissues of the floor of the mouth located below the internal oblique line [2].
- The patient pulls his cheeks inward and makes LF movements to the sides.
- Places the lips in a tube and draws the corners of the mouth back, forming the area of the bucco-alveolar cords.
- Finally, the tip of the tongue rests on the place where the handle is attached to the SL until the impression material is completely cured, thereby forming the edge of the PO in the area of the sublingual ridges (Laurizen test).
- Such tests as touching the cheeks with the tip of the tongue with the mouth half-closed and licking the upper lip often lead to shortening of the lingual borders of the prosthesis and, as a consequence, to poor fixation of the prosthesis [3].
When receiving PO with LF, it is necessary that the mouth be closed as much as possible, because when open, the boundaries of the PO can be distorted by tense muscles.
When using perforated trays, it is important that when removing the tray from the mouth, the material does not tear off the tray, since repositioning the impression back will be difficult and can lead to its deformation.
The best way to remove the impression from the mouth is to press on the excess material in the lateral areas of the vestibule of the mouth or, before removing the tray from the mouth, press firmly against the jaw for 2-3 seconds. During this short time, the gap between the PO and the jaw is deformed, the capillary effect disappears, and the SL with the impression can be removed without resistance. An attempt to remove the software by the handle may result in the mass being torn off from the SL.
After removing the software from the oral cavity, pay attention to the following points:
- Adhesion of impression material to SL. When separating the OM from the spoon, the software must be re-removed.
- Correspondence between the software boundaries and the future PSP. If its peripheral borders are significantly shortened, the impression must be made again.
- Presence of porosity in the print. If there are large or multiple pores, the software is re-shot.
- The edges of the software should be smooth, rounded, but not thick. The latter indicate stretching of the soft tissues, which does not correspond to their anatomical shape and indicates an expansion of the boundaries of the relatively immobile mucosa of the oral cavity.
- No blurred relief of the prosthetic bed.
Boundaries of individual spoons
To maximize the transfer of information to the dental technician, the boundaries of the IL must be marked on the software with a marker in the presence of the patient for possible clarification. To facilitate this stage, you can mark anatomical landmarks with a chemical pencil in the oral cavity, and when the software is re-applied to the prosthetic bed, they will appear on its surface. Due to the fact that the alginate mass has a viscous consistency, the boundaries of the impression in any case are expanded. Therefore, when drawing the boundaries of the IL, it is recommended to step back from the edge of the print by 4-5 mm. You can also note on the impression areas with low-yield CO, buffer zones identified using a spherical smoother, and “dangling ridges.”
For several years now, the author has been using the following IL guidelines. On the upper jaw, the IL overlaps the maxillary tuberosities, passes along the buccal vestibule just below the neutral zone, while widely bypassing the buccal-alveolar cords. In the area of the labial vestibule, the border of the IL is 2 mm less than the depth of its potential space and, bending around the frenulum of the lip in the form of a narrow slit, passes to the opposite side. The posterior border is the line connecting the pterygomaxillary notches, located 2 mm distal to line “A”.
You can mark anatomical landmarks with a chemical pencil in the oral cavity, and when the software is re-applied to the prosthetic bed, they will appear on its surface. At the NP in the area of the labial vestibule, the edge of the IL is shorter by 2 mm of the depth of its potential space. In the buccal vestibule, widely bending around the buccal cords, the border passes along the external oblique line, then along the lateral surface of the retromolar region, bending around the bundle of the masticatory muscle itself in a tense state, then horizontally crosses the mucous tubercle at the level of its 2/3 and sharply descends vertically down or distally at an angle of 45 degrees to the internal oblique line, moving along it medially.
Located in front of the hyoid ridge and bypassing the frenulum of the tongue and the mental torus, the border of the IL continues to the other side of the LF. Depending on the muscle tone of the floor of the mouth, the internal oblique lines overlap by 2-6 mm (the lower the muscle tone, the greater the overlap). The excretory ducts of the salivary glands always remain open.
Shortening the edges of the IL relative to the boundaries of the PSP should be done by the thickness of the edging material used (for A-silicones this is 2-3 mm).
In order to correct the edges of the oral cavity, taking into account the functional state of soft tissues (in length and thickness) and bringing them as close as possible to the boundaries of the oral cavity, we can recommend the author’s method of fitting the oral cavity (patent for invention No. 2308905), which has been used by the author since 2005. This stage identifies, eliminates and prevents errors made when obtaining the software, which significantly reduces the stage of fitting the IL and improves the quality of the FD.
Author's methodology for adapting software
After marking the borders of the IL with a marker (Fig. 1), the doctor, using a scalpel placed perpendicular to the surface of the alveolar ridge, cuts off the edge of the IL along the marked line (Fig. 2). After this, the software can be introduced into the oral cavity to clarify its boundaries relative to the anatomical landmarks of the oral cavity, taking into account their functional state (the edges of the fitted software should be close to the boundaries of the future oral cavity). If necessary, the edges of the PO can be repeatedly adjusted by trimming with a scalpel. To make it easier to perform the stage of fitting the PO in the oral cavity, you can use a scalpel to make the edge of the PO 3-4 mm thick around the entire perimeter (Fig. 3).
Rice. 1. Schematic section of the maxillary PD in the projection of the molars (the limiter on the palatal surface of the SL is indicated in green). Rice. 2. Schematic representation of the shortening of the edges of the PO along the boundaries of the IL. Rice. 3. Schematic representation of the shortening of the edges of the PO in thickness (3-4 mm).
After that, on the cast plaster model in the area of the base of the alveolar ridge, a platform is obtained that is perpendicular to the surface of the vestibular slope along its entire perimeter (Fig. 4-6).
Rice. 4. Schematic representation of a section of a plaster model with a given thickness along the edge and fitted software. Rice. 5. Photo of a plaster model obtained using the adapted software, with the boundaries specified by the doctor for the production of IL. Rice. 6. Photo of a plaster model obtained using the adapted software, with the boundaries specified by the doctor for the production of IL.
This area is a specific limiter on the length of the edge of the future IL and its thickness (3-4 mm), which is a necessary condition for obtaining a volumetric edge of the FO. Displaying on the software areas with significant compliance (the area of buffer zones according to E.I. Gavrilov) and thinned SO (torus, exostoses) using a marker will give the dental technician the opportunity to produce IL for a differentiated FO. The boundaries of buffer zones are easily determined using a ball-shaped trowel.
When designing the software functionally, it should be remembered that the time spent is proportional to the quality of the FO, and therefore the degree of fixation of the PSP, and inversely proportional to the time spent on fitting and edging the PO. In order to prevent the spread of nosocomial infection, the PO is first disinfected by rinsing it with a stream of running water for 1 minutes. This simple manipulation reduces microbial contamination of the impression by approximately 50%. Then the software is immersed in a glass container with a disinfectant solution. Disinfection is carried out with the lid closed and the software completely immersed in the solution. In this case, the level of the solution above the impression must be at least 1 cm. After the procedure is completed, the software is removed from the solution and washed with a stream of water for 0.5-1 minute to remove residual disinfectant. And only after this the software is transferred to the dental laboratory. Ideally, alginate impressions should be cast with plaster within the first 30 minutes of taking them. If they are cast in a remote dental laboratory, they should be transported in a plastic bag along with a piece of damp cloth to prevent drying out. At the same time, the fabric should not touch the alginate to prevent local swelling of the material. Before casting the working model, you can sprinkle the inner surface of the PO with gypsum powder; after 1-2 minutes, rinse the impression thoroughly under running water and remove any remaining powder with a soft brush. This will clear the software of mucus residues and bind free chains of alginic acids.
The most common errors when obtaining software:
- Shortened borders of the PO and, as a consequence, difficulties that cannot always be eliminated during the fitting of the IL in the oral cavity. Reasons: incorrectly selected SL (short edges), lack of individualization of its edges, unreasonably widespread use of passive samples in the functional design of software, high viscosity of the OM.
- Excessively long software boundaries lead to an increase in the doctor’s time spent at the stage of fitting the IL. Reasons: incorrectly selected SL (long edges), high viscosity of OM, low intensity of active functional tests, lack of silicone limiters.
- One-sided displacement of the software distorts the true boundaries of the IL. Reason: failure to use limiters/positioners.
- Significant compression of the tissues of the prosthetic bed of the OM may prevent further obtaining a functional differentiated impression. Reason: use of high viscosity OM.
- The presence of significant pores along the edges of the software and on its inner surface. Reason: incorrect application of the impression to the prosthetic bed, use of a high degree of viscosity OM.
- Transmission of SL through OM. Reasons: small SL, lack of silicone stops and excessive finger pressure on the spoon.
- Thin, dangling edges along the edge of the PO are easily deformed during casting of the plaster model, subsequently distorting the dimensions and boundaries of the PO. Reasons: incorrectly selected SL (short edges), lack of individualization of its edges, thin or incorrectly mixed OM.
- Software deformation (not visualized). Reasons: significantly delayed receipt of the plaster model, use of a long-term immersion method to disinfect the software.
- A “smear layer” of plaster on the working surface of the model. Reasons: the surfaces of the tissues of the prosthetic bed and software are poorly cleared of mucus and alginic acid.
Conclusion
When designing the software functionally, it should be remembered that the time spent is proportional to the quality of the FO, and therefore the degree of fixation of the PSP, and inversely proportional to the time spent on fitting and edging the IL. With a hasty and careless attitude to the stage of obtaining the software, it is difficult to count on the correct formation of the edges of the FO and obtaining functional suction of the PSP. Errors at this initial stage of prosthetics can later become a serious obstacle to achieving a good final result. Remember that the strength of the entire chain is determined by its weakest link.
Literature
- Lebedenko I. Yu., Voronov A. P., Lugansky V. A. Methodology for obtaining preliminary impressions from edentulous jaws using the author’s technique. - M., 2010. - 54 p.
- Boucher S. Prosthodontic Treatment for Edentulous Patients/ S. Boucher, G. A. Zarb, C. L. Bolender, G. E. Carlsson. - Mosby, 1997. - 558 p.
- Hayakawa I. Principles and Practices of Complete Dentures / I. Hayakawa. - Tokyo, 2001. - 255 p.
Impression from the upper jaw
The specialist’s algorithm of actions includes 4 stages:
- The mouth opens wide and the spoon is placed on the high frequency. The displaced product is shortened behind the modular tubercle.
- Cheeks retract. The device is shed by the buccal cords, and its dimensions decrease near the sixth, seventh and eighth teeth.
- The upper lip is pulled down and forward. When the location changes, the device is shortened by about 3, 4 and 5 teeth.
- Pulling the lips forward with a long tube. Shortening is performed around 12 dental units.
The test is considered completed if there are no displacements. Fitting should be done carefully to prevent significant reductions in the basis boundaries.
Evaluating the results of the HF fitting allows the specialist to create an impression tray of the ideal shape. After adjusting the listed parameters, the dentist begins to form an impression.
Making an individual plastic spoon in the laboratory.
In this case, an anatomical cast is taken with a standard spoon and a plaster model is cast from it. On the model, the dental technician draws the boundaries of the future individual tray . On the upper jaw, the border of the tray passes from the vestibular side along the transitional fold, not reaching the deepest point of its arch by 1-2 mm. On the distal side, it overlaps the maxillary tuberosities and runs along line “A” behind the palatine fossae by 1-2 mm. On the lower jaw, the border of the spoon passes from the vestibular side along the transitional fold, not reaching 1-2 mm to the deepest point of its arch, while bypassing the cords and frenulum of the lip. In the retromolar region, it is located behind the mucous tubercle, overlapping it by 1-2 mm. On the lingual side, the border of the spoon overlaps the area corresponding to the retroalveolar region (muscleless triangle), not reaching the deepest place of the sublingual space by 1-2 mm and going around the frenulum of the tongue. From the above it is clear that on both the upper and lower jaws the border of the individual tray is 2-3 mm less than the borders of the prosthesis. This is done so that there is space left for the impression material. The extruded impression material forms the edges of the impression. And, conversely, the distal boundaries of the tray must be larger than the boundaries of the prosthesis so that the anatomical formations, which are landmarks of the distal edge of the prosthesis, are well imprinted when taking an impression.
After drawing the boundaries, the dental technician coats the model with Izokol insulating varnish and begins making an individual tray from quick-hardening or base plastic. To make an individual spoon from quick-hardening plastic, the required amount of material is kneaded to a dough-like stage and a plate is made from it in the shape of the upper or lower jaw, which is pressed onto the model along the outlined boundaries. Then small pieces of plas are used to make a handle perpendicular to the surface of the spoon, rather than tilted forward. This position of the handle will not interfere with the design of the edges of the print. If the alveolar part of the lower jaw is significantly atrophied and the spoon turns out to be narrow, then the handle is made wider, almost up to the premolars: with such a handle, the doctor’s fingers will not deform the edges of the impression when they hold it on the jaw. After the plastic has hardened (10-15 minutes), the spoon removed from the model and processed with cutters and carborundum heads ( the individual spoon is not polished), making sure that the edges of the spoon correspond to the boundaries marked on the model. The thickness of the edge of the spoon should be at least 1.5 mm, because With a thinner edge, it is difficult to obtain the volume of the edge of the print. An individual spoon can be made from base plastic using the polymerization method. To do this, the heated wax plate is pressed tightly onto the model, giving it the shape of an impression tray, and excess wax is cut off with a spatula along the marked boundaries. The wax mold of the spoon is plastered into the cuvette in the reverse way and the wax is replaced with plastic. When making a spoon from AKR-P plastic, standard plates are softened in hot water and crimped according to the model. The excess is cut off with scissors after the corresponding area has been softened. The handle is made from scraps of material and glued to the spoon with a hot spatula (the heat melts and welds the plastic).
Individual spoons made of plastic are classified as rigid spoons. They can be used, as well as thermoplastic trays, to take compression impressions. Advantages and disadvantages of custom plastic impression trays . Plastic spoons are rigid and do not deform in the oral cavity, but, like any laboratory-made spoons (in two visits), they require subsequent correction in the oral cavity. In addition, spoons made in this way provide a modified display of soft tissues, because they are compressed and stretched during the taking of the anatomical impression.
Individual wax trays for the upper and lower jaws
Individual wax spoons can be made either in the laboratory or directly in the mouth. Wax trays using the CITO method are made in one visit directly on the jaw of the prosthetic patient. Such spoons are more accurate than individual ones made from an anatomical cast, because they display the soft tissues of the prosthetic bed at rest. The disadvantage of such trays is that the soft wax is deformed during fitting in the oral cavity and when taking an impression (it cannot withstand pressure), so the wax spoon can only be used to remove decompression impressions. Individual spoons , regardless of the method and material they were made from, must be placed in the oral cavity. A correctly fitted spoon sticks to the jaw and does not lag behind it when moving the lips and cheeks. , the technique of fitting individual spoons using Herbst functional tests has become widespread Functional Herbst tests are recommended when fitting individual trays and obtaining functional impressions .
Five tests are used on the lower jaw:
1) swallowing and wide opening of the mouth;
2) movement of the tongue to the sides along the red border of the upper and lower lips;
3) touching the cheeks with the tip of the tongue with the mouth half closed;
4) movement of the tip of the tongue forward beyond the lips towards the tip of the nose;
5) pulling the lips forward. Three tests are used on the upper jaw:
1) wide mouth opening;
2) cheek suction;
3) shifting the lips forward (pulling).
